Related Posts with Thumbnails

Project 52 - Week 3

OMG this week I actually took pictures outside (gasp!) I know its shocking to me too. I got out the house. As you may know from previous posts I am a "faux" stay at home wife and am chained to my corporate laptop throughout most of the day and it is rare that I get out the house at all from Monday to Friday.


This week I also experimented with different effects. I am trying to figure out what I like and don't like in order to find my own personal style.

I found a leaf left over from autumn. Where did that little guy come from?


Equipment from a build site in the neighborhood.


Gladiolas from Roosevelt's birthday


My friend Ruby


And together we made a cake to match her beautiful red color. (recipe post coming)


Read more...

Crab Cakes Yummmmm


If you may start to notice most of my cooking decisions center around what is on sale at the supermarket. Well lo and behold lump crab meat was on sale this week, so I thought why not try my hand at crab cakes. Where ever we go and it's on the menu you best believe its going to wind up on my plate. I figured it couldn't be too much different than salmon cakes which I make all the time and which was a staple recipe in my house while growing up.

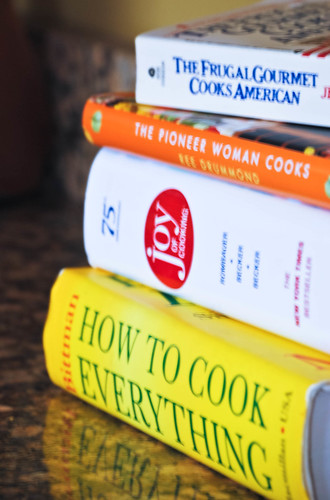
I pulled out my trusty reliable cookbooks and I decided to go with the recipe from Mark Bittman's How to Cook Everything since right off the bat he said "I like crab cakes that are mostly crab and seasonings with a minimum of bread crumbs." That's what I'm talking about. A man after my own liking. All the other recipes relied heavily on bread crumbs (even Ms. Martha) which is a no-no in my book.

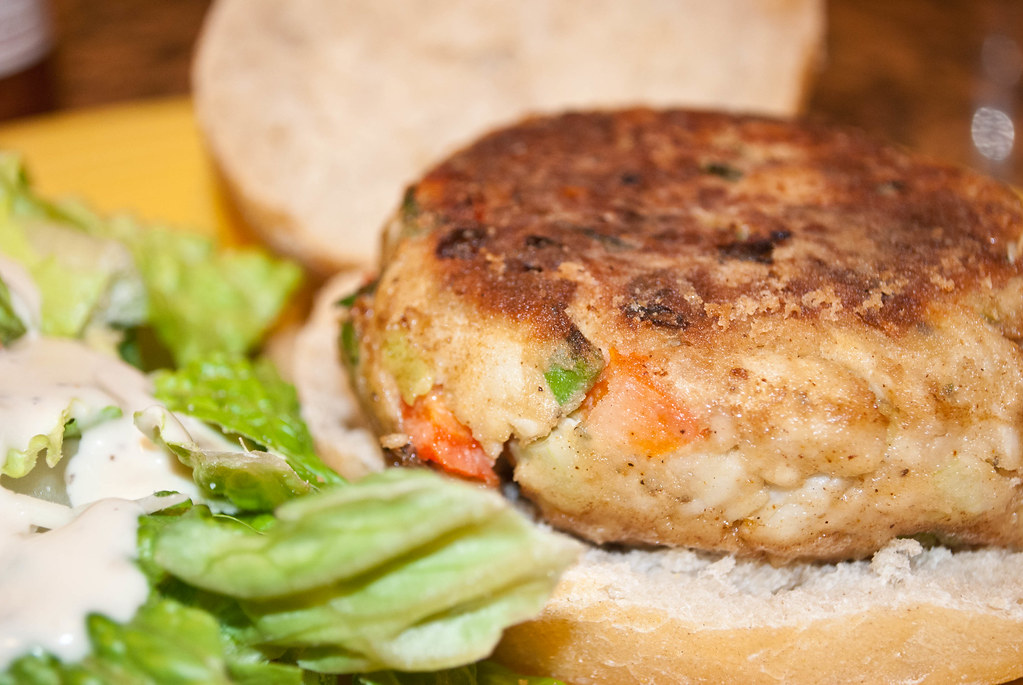
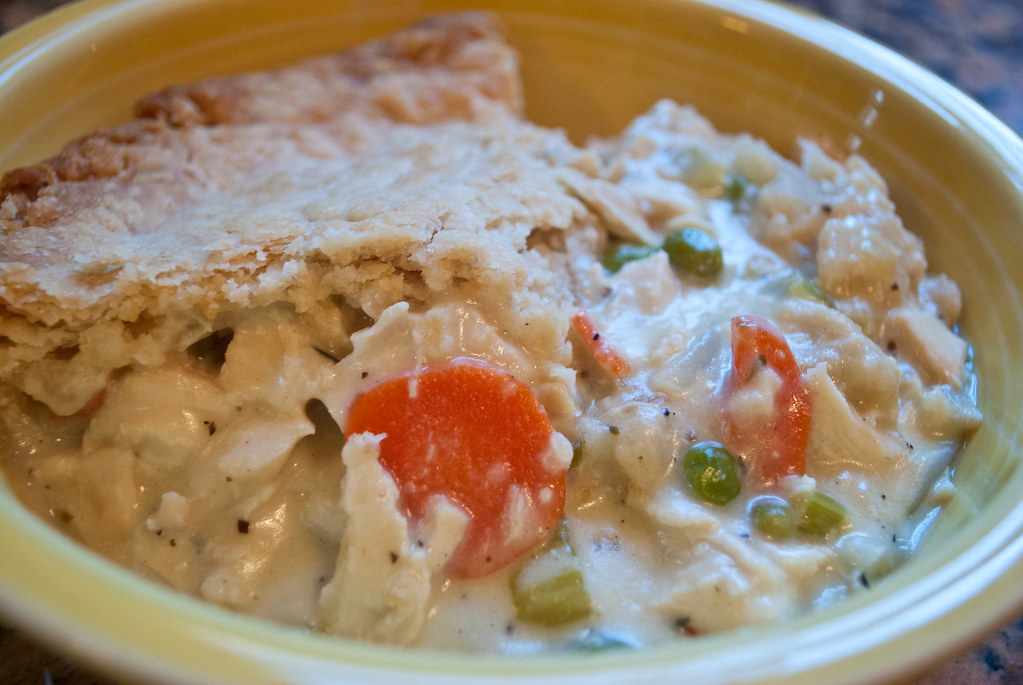
Overall I was really quite pleased with the results (great texture and flavoring) and the ease of the recipe, and will definitely be making them again as soon as crab goes back on sale ;)


Crab Cakes (modified from How to Cook Everything)

Makes 4 cakes (I got 5 out of the recipe)
  • 1 pound of fresh lump crabmeat
  • 1 egg
  • 1/4 cup minced red bell pepper
  • 1/2 cup minced scallion 
  • 1/4 cup of mayonnaise
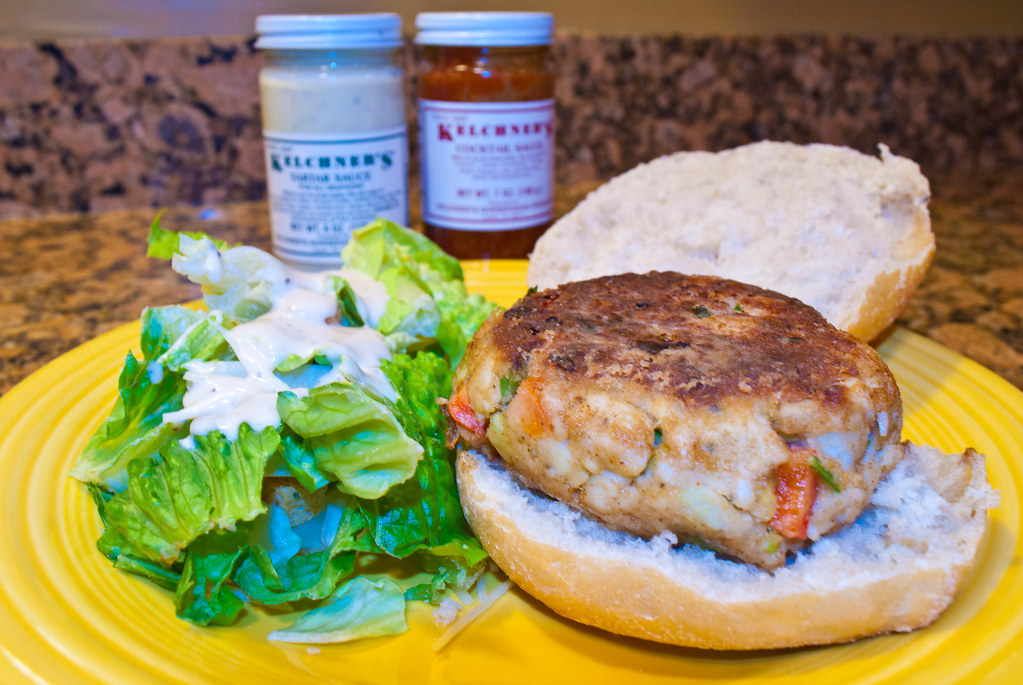
  • 1 tablespoon of mustard (I used Kelchner's hot mustard which has horseradish since I wanted a bit of a kick but the traditional choice is dijon)
  • Fresh cut parsley (I added about 1/4 cup)
  • Dill (to taste)
  • Old Bay seasoning (to taste)
  • Kosher salt and pepper (to taste)
  • 2 tablespoons of bread crumbs, or as needed
  • 2 tablespoons of olive oil
  • 2 tablespoons of butter (or use oil)
Mix together the crabmeat, egg, pepper, scallion, mayonnaise, mustard, and seasonings (dill, old bay, salt, pepper, & parsley).  Add sufficient bread crumbs to bind the mixture just enough to form into cakes, start with 2 tablespoons and use more if you need it. (I had to roughly 4 tablespoons to get it to a consistency I felt was good enough).

Refrigerate the mixture till ready to cook (at least 30 minutes or more)

Season the flour with salt, pepper, and Old Bay. Preheat a large skillet (non-stick) over medium heat for 2-3 minutes. Add oil and butter and heat until butter foam subsides. Shape crabmeat mixture into cakes, dredge in flour, and cook adjusting the heat as necessary and turning very gently once until golden brown on both sides. Total cook time is about 10 minutes.

I like to eat mine with tarter and cocktail sauce (most people think that is very weird but I love it).

Read more...

Blueberry Muffins: They are good but I want great


I tried my hand at blueberry muffins this week after spying blueberries at a good price at the supermarket. I thought they would be nice for Roe to take with him in the morning for breakfast to go with his daily coffee he picks up on his way to work. I consulted two of my cookbooks for a basic recipe, Joy of Cooking and How to Cook Everything. For some reason the recipe from the Joy of Cooking struck a chord with me, plus they had a whole section regarding cooking tips and ingredients for muffins. While the muffins were good they were not up to the level I wanted. I thought they were a little lacking in the sweetness department and the texture could have been a little more like cake for my liking. (I know to some muffin enthusiasts that there should be a clear distinction between the texture of muffins and cake because they are not one in the same. But hey I like what I like.) Unfortunately I was being a lazy girl and did not do my usual due diligence and look up a recipe on the Martha Stewart website. When I went there today I found what I think sounds like a better recipe, more to what I am looking for in terms of sweetness and texture.

I think this recipe from Joy of Cooking is good but I am definitely going to try Martha's. (Oh why did I forsake you Martha?!) I have found that 8 times out 10 Martha usually has the best baking recipes.

Here are some of the pointers I picked up from the Joy of Cooking though on muffins:

  • Once you master a basic muffin recipe you can make tons of variations by using different add ins (berries, nuts, etc). I will share with you the basic recipe below and the modification to make blueberry.
  • Mixing should be at a minimum so as not to develop gluten in the flour which will toughen the muffin. ;( However, the MS recipe listed below is mixed more like a traditional cake so go figure.
  • Muffins that are served hot from the oven can have less oil or butter. If you are making them ahead for consumption later more butter is advised.
Blueberry Muffins (Courtesy of Joy of Cooking)

Makes 12 regular muffins or 6 large.

Preheat oven to 400 degrees

Whisk together thoroughly in a bowl
  • 2 cups of all purpose flour
  • 1 tablespoon of baking powder
  • 1/2 teaspoon of salt
  • (1/4 teaspoon of grated or ground nutmeg - optional and I omitted)
Whisk together in another bowl
  • 2 large eggs
  • 1 cup of milk or cream
  • 2/3 cup of sugar or packed light brown sugar (for the blueberry variation they advised to use 1/3 of a cup)
  • 1/4 to 1/2 cup of butter melted or vegetable oil (I used a 1/2 cup of butter since I was making them ahead for consumption later)
  • 1 teaspoon vanilla
Add to flour mixture and mix together with a few light strokes. If making blueberry muffins fold in 1 1/2 cup (I used 1/2 pint) of fresh or unthawed blueberries. Do not over mix and the batter should not be smooth. Divide batter among muffin cups. Sprinkle top with sugar. Bake until toothpick inserted in muffins comes out clean - about 17-20 minutes.

Now here is the recipe from Martha I want to try next time. If you try it let me know what results you get.


Ingredients

Makes 6 large or 12 small muffins
  • 6 tablespoons unsalted butter, room temperature, plus more for tins
  • 3 cups plus 2 tablespoons all-purpose flour
  • 3 teaspoons baking powder
  • 1 teaspoon salt
  • 1 1/4 cups sugar, plus more for sprinkling
  • 1 large egg
  • 2 large egg yolks
  • 1 teaspoon pure vanilla extract
  • 1 cup milk
  • 1 3/4 cups blueberries
Directions

Preheat the oven to 375 degrees.butter large (3 3/4 inches) or small (2 3/4 inches) muffin tins, and set aside. In a large bowl, sift together flour, baking powder, and salt; set aside.

In the bowl of an electric mixer fitted with the paddle attachment, cream butter and sugar on medium speed until fluffy, about 3 minutes. Add egg, egg yolks, and vanilla; mix until well combined. Reduce speed to low; alternate adding reserved flour mixture and milk to mixer, beginning and ending with flour.

Remove bowl from mixer; gently fold in berries by hand. 

Divide batter among muffin tins; sprinkle generously with sugar. Bake until light golden, about 45 minutes for large muffins, about 30 minutes for small muffins. 

Cool in pan 15 minutes. Remove from pan; transfer to wire rack, and let cool completely.

Read more...

I think I have found a kindred spirit

I love her blog. My husband is going to be hating me because she has so many yummy recipes I want to try.

Go over and check it out.

Read more...

Making Preserves is Sooooo Easy


Making fruit preserves is soooooooo easy and very rewarding. Nothing beats the taste of fresh preserves made from your own two little hands. My auntie from Virginia was big into canning and I always thought it was hard or difficult till I learned how this past summer. Now I can all the time, when ever the mood strikes me (or when I can good prices on fruit at the market). This past weekend I noticed that strawberries had finally came down in price which was so ironic since we just finished off our last jar of strawberry preserves from my last big batch of canning. That was the sign for me to break out my Ball jars and get to work.

A couple of tips about canning from my experience.

  • You don't need fancy equipment. I use my 8 quart stockpot, BBQ tongs, and a large spoon. No rack and no funnel.
  • Jars are easy to acquire, they are sold in most supermarkets. Plus they are recyclable.
  • I boil and sterilize everything, jars, lids, spoon, tongs - just to be on the safe side. I sterilize as the preserves are cooking.
  • I do not add pectin to my preserves. I find that enough sugar and cook time will lead to the desired thick consistency I want.
  • I don't always hear a pop indicating that the jar has sealed properly but if you press the center of the lid  and does not move than it has sealed safely.
If you want to read thoroughly on the process here are some links (I am not really great at writing tutorials).


You can also make the following recipe and just jar it and refrigerate. You will still need to sterilize the jars but it shortens the processing time. Preserves should keep in the refrigerator for at least  two to three weeks.  


Strawberry Preserves (Courtesy of Joy of Cooking)

  • 2 pounds of fresh strawberries hulled and sliced (I prefer large chunks in mine so I usually do a mix of halves and quarters)
  • 2 1/2 cups of sugar (the recipe called for 3 but I found the recipe perfect with less)
  • Lemon juice (recipe calls for 1/4 cup but I did mine to taste)
Mix sugar and strawberries in a heavy pan under high heat. You want this puppy to boil. Once sugar has melted and notice foaming add in lemon juice. At this point I crush the mixture slightly with a potato masher to give it more texture. Continue to stir frequently. Skim off any foam that forms. (You will have to do this repeatedly). You will notice that it will cook down and began to form into a preserve like consistency. I like mine thick so I cook it down more. Once the preserves have cooked down transfer to sterilized jars and place filled jars back into pot making sure they are covered with water. You will need to boil the jars to seal and boiling time depends on the size of the jar. (see following link for guide & also great canning tips: http://pubs.ext.vt.edu/348/348-594/348-594.html) I usually do 30 minutes to be safe which is longer than what is needed.


Read more...

Loved It!!!

Yet another post in my ongoing obsession with Michelle.

I absolutely ADORED her outfit from last night's State of the Union. Can I be like her when I grow up? LOL


Getty Image by Madel Ngan

Read more...

Fridge Front

So a while back Erin at Domestic Adventure asked the blogsphere what our refrigerators looked like. I just now got around to posting pics of our little refrigerator which is a peek inside my warped sense of humor and also a record of my husband and my travels.


So the top is covered with funny retro magnets. Let's take a closer look at one.


Which is almost the exact opposite of what is posted so prominently in the middle which is the"Good Wife's Guide" (which has been posted on my fridge since I was a single girl). Though dated and very anti-feminist some are the tips are quite relevant and helpful.


On the side of the refrigerator is my husband's magnet collection from all our travels.


And here is a close up of my favorite travel magnet.

Read more...

Bathroom Redo - We have fixtures

For the past week or so I have been trolling the internet to find a bathroom vanity, sink and fixtures for our bathroom redo. I had already visited our local Lowe's and Home Depot and knew I didn't want a traditional looking vanity. (I say "I" because my husband has given me free reign over this project. I do run everything by him to make sure it's not something he adamantly objects to but for the most part he trusts my choices.) I also experienced severe sticker shock in seeing what a basic vanity with marble top sink could cost.

Luckily Sherry and John from Young House Love came to the rescue of me overpaying for a plain jane standard vanity. They recently redid their main bathroom and had a fab idea for creating a sleek vanity. So I took a page from their book and began to hunt for a nightstand that could be fitted into a bathroom vanity. My biggest hurdle was in finding a nightstand that would fit the look I was going for which was rustic modern and something that was tall enough. We wanted a vanity that is taller than our current one which is 30" high. With Roe being over 6' it just helps that he doesn't have to bend over as much when getting ready. I also appreciate it too with my 5'5" frame. I scoured sites across the internet from Pottery Barn, Amazon, Crate and Barrel and other obscure furniture sites. Eventually I found what I wanted at Overstock. The great thing was I was able to also find a sink and faucet there as well.  And the price was right. I got $10 off  and free shipping with an online coupon plus by joining the O club I got an additional 5% off. The club membership was $20 but it was less than the discount amount off my total. Plus we get 5% off all our orders and free shipping for a year.

So here is what will be going into our bathroom, now off to Lowe's/Home Depot to find a floor. Will also begin to hunt for a new mirror as well.  I am contemplating changing our paint color to Navajo white which matches the color of our powder room in the basement (which I love!). But I think my husband will kill me since we just repainted the bathroom last year. I may be doing that alone ;(


Read more...

Project 365 Blog of the Week

Tara from In This Instance is participating in Project 365. (Quite a few bloggers that I follow are doing it this year). I started to read Tara's blog when I first started wedding planning and her wedding was a great source of inspiration for my own. I simply adore her style.

When you get a chance peek over at her blog she is an interesting girl ;)

Here are some of my fave shots so far from her Project 365.


Read more...

Week 2 of Photos

So this week I will admit that I don't have that many interesting shots. Between a family crisis and work the camera did not come out too often.


My cousin was in town visiting his girlfriend and we all went out last Saturday for drinks. When coming in 2 something in the morning your 4" heel shoes wind up under the kitchen table.


A little vignette of Nora and my veil. Oh how lovely she is!


I picked up some tulips to brighten up our living room.


Experimenting with different focus points.


Experimenting with macro shots. Was surprised that I was even able to capture the particles of dust on the shelf. WOW.

Read more...

Spaghetti and Meatballs


I was reading the Pioneer Woman's blog and noticed her recipe for meatball soup and thought to try it with traditional spaghetti. I liked the flavor it had with the addition of the freshly grated parmesan cheese. I also had enough left over to freeze and use for meatball subs (Yum!). Each month I make 3-5 quarts of sauce and freeze it so that I have a way to create quick dinners on nights where I am pressed for time. Once again I can give exact quantities for my sauce just ingredients since I make it to taste.


Basic Pasta Sauce

  • Olive Oil
  • Minced Garlic
  • Tomato Paste (1-2 cans depends on how much I am making)
  • Can Tomato Sauce (2-4 cans)
  • Diced Tomatoes
  • Minced Garlic
  • Basil
  • Oregano
  • Parsley
  • Kosher Salt
  • White Pepper
  • Sugar
1. In a crock pot set to high I pour in some olive oil and the minced garlic and let that cook for about 5 minutes

2. I add in the tomato paste, tomato sauce, diced tomatoes, basil, oregano, and parsley.

3. Let cook for about an hour. Then I season with pepper, salt and sugar

4. I let it cook for another 1-2 hours.

5. Let cool and freeze.

Pioneer Woman Meatballs 
  • ¾ pounds Ground Beef
  • ½ cups Freshly Grated Parmesan Cheese
  • 3 Tablespoons Fresh Parsley, Minced
  • 1 whole Egg
  • 2 cloves Garlic
  • ½ teaspoons Salt
  • ½ teaspoons Black Pepper
  • ¼ teaspoons Ground Oregano
  • 2 teaspoons Lemon Juice (I omitted the lemon juice)
  • Olive Oil for cooking
1. Combine all meatball ingredients and mix well. Shape into small balls and chill for 30 minutes.
2. After chilling, heat olive oil over medium-low heat in a heavy pot. Thoroughly cook meat.


Read more...

What's on my Shelf in the kitchen?


So Ashley & Stephan over at (never home)maker posed the question what is on your shelf, ie your cookbooks, and since I have been meaning to post about this same topic what better time than the present.

I thought I had a lot of cookbooks but Ashley and Stephan beat me hands down. Even though I have a lot I only consult on a regular basis probably 4-5 of them. I am going to highlight my favorites and the ones that I have found most useful.

Joy of Cooking - 75th Anniversay Edition by Rombauer, Rombauer & Becker
I don't know why I waited so long to get this book. By far it is one of the most comprehensive and useful cookbooks there is - hands down. I see why so many coks have it in their kitchen. I turn to this book to read up on ingredients, understand the basics of various techniques, and as a starting point for any new recipe. I don't know how I got along in the kitchen before I got it.

How to Cook Everything - Bittman While there is a new updated edition I have the original. This book is my second most used cookbook because like the Joy of Cooking it does a great job at explaining how ingredients come together to form a recipe, gives the basics of techniques, and gives suggestions on how to do variations of recipes. Another great volume for the beginner cook or as a reference for the more experienced.

Better Homes and Garden Cookbook - This was my first cookbook (I have an edition from the md-90's) and it has great classic recipes. I use it a cross refence with Joy and Cook Everything to develop recipes.

The Martha Stewart Cookbook: Collected Recipes for Every Day - Though some recipes are outside of every day (you know Martha is not quite like the rest of us) there are some excellent recipes in the book. Though not comprehensive enough to be used as a everyday reference, I am sometimes pleasantly surprised as what is contained within.

The Black Family Reunion Cookbook- Recipes and Food Memories by  National Council of Negro Women Though not an everyday cookbook, I can't cook with Crisco and butter every day, however, it helps me to recreate some of the recipes from my childhood. It is the food that I eat when I go to visit relatives down south or I am cooking for big holidays.   If you want some basic soul food recipes this is the one.

Books I use more infrequently but still love:
The Pioneer Woman Cooks: Recipes from an Accidental Country Girl  by  Ree Drummond
Martha Stewart's Cookies: The Very Best Treats to Bake and to Share by Martha Stewart Living Magazine
Cookwise The Secrets of Cooking Revealed by Shirley Corriher 

The other large source for my recipes are the Martha Stewart website and Food Network Magazine.

Books I want:
Martha Stewart Living Cookbook: The Original Classics
The Fannie Farmer Cookbook
The Deen Brothers Cookbook: Recipes from the Road

Read more...

So what goes into making a great pie crust


So after cranking out an excellent pie crust this past weekend courtesy of The Pioneer Woman's Cookbook, it got me to wondering what makes for a great pie crust. What do you need to get a flaky, rich, tender pie crust like the one in her recipe? Well I consulted my copy of Understanding Baking: The Art and Science of Baking 3rd edition, a great book for anyone who is serious about baking and here is what it had to say.
  • The type of fat you use in making pie crust is critical. Fats that remain solid at room temperature (such as lard or vegetable shortening) make for the flakiest crusts. Oil on the other had coats the flour preventing gluten from forming and thus results in a crust that is crumbly and too tender.
  • Butter gives a pie dough a better taste, however it has more water and less fat than vegetable shortening or lard. Butter also needs to be kept very cold so that it will hold its shape in the dough until it sets and won't melt in the flour. This is critical since a flaky crust is the result of fat melting in the crust during baking leaving air space behind which makes the pie crust flake.
  • Ingredients which are highly acidic such as vinegar, lemon juice, or sour cream make the crust tender by aiding in the break down of gluten proteins.
  • Protein from dairy products such as egg promotes browning.
  • Ingredients should be as cold as possible when combining to promote a flaky crust
  • A minimum amount of water should be used since water contributes to gluten formation which can toughen the crust. (So its too much water that makes a pie crust tough!)
  • Refrigerating the dough for several hours or overnight after mixing and forming into discs allows the dough to become hydrated which makes it easier to roll, prevents shrinkage when baking, and adds to better quality in taste.
  • When working with doughs rich in butter they should be chilled after rolling which prevents the fat from melting too quickly in the baking process.
So Pioneer's woman has all the ingredients to make delicious crust: a fat that is solid at room temperature, minimal water, and acid that aids in tenderness, a protein that promotes browning, and refrigerating the dough to allow for hydration.

Hope this helps you in making better pie crust.

Read more...

Wedding Video

We got our wedding video today. Yeah.

Thank You Well Spun Weddings!


Read more...

I thought I would be able to do it


I was the girl that swore up and down before her wedding that she was not emotionally attached to her dress. That I could easily sell it in a heart beat after the big day. It was an easy way to recoup some of the wedding expense. What was the big deal, its not like I would ever wear it again. At least it could bring joy to someone else.

But here we are over 4 months out from the wedding and it is still here. I can't let go. I love Nora and don't want to part with her. Ever since we got back from our honeymoon she has been adorning my professional dress dummy in our bedroom. I take her off her little pedestal every couple of weeks and try her on and glide around the house. I thought I would take her to get professionally cleaned, I thought I would formally post her for sale on all the wedding boards, or send her over to a consignment shop but NOOOOOOO. She is still with us and I don't see her leaving anytime soon.

Has anyone else been reluctant to part with their wedding gown? Where is your gown now?

Read more...

Chicken Pot Pie


Today was the first time I tried a recipe from the Pioneer Woman's cookbook. I got the book almost a month ago and have been dying to try some of the recipes. So with the long weekend and the fact we had a huge pack of chicken breast in the freezer I decided to give her chicken pot pie recipe a go. I thought this recipe would be a challenge for me given the fact that I bulk at making pie dough since in the past I have not had the best of results. I figured if I botched the crust I could easily top it with biscuits and make Chicken and Biscuits. The mixing of the crust was fairly easy, especially since I purchased a pastry cutter to work in the shortening. My biggest fear was in rolling out the dough and over working it, thus making it rubbery. But the crust remained very soft. I will admit that I had some trouble with the dough sticking to my work surface, but a pastry scraper really helped in lifting up the dough. The recipe actually recommends making the dough ahead of time and freezing, and I think I will try that to see if it handles differently. But overall I was really pleased with the recipe. The filling was flavorful, creamy, and rich and the crust was so flaky and delicious. (My husband loved it!!!!!!) This is definitely now on my recipe rotation and I am going to use this dough recipe for pies and tarts (now that I found an easy dough recipe that renders good results I can now perfect my pie making).


Chicken Pot Pie (Courtesy of Pioneer Woman)

  • 2 pie crusts (Pioneer Woman Perfect Pie Crust recipe) - I used one to line the casserole dish and one for the topping
  • 1/2 stick butter
  • 1/2 large onion finely diced
  • 3 carrots diced
  • 3 celery stalks finely diced
  • 1/2 cup frozen peas 
  • 2 cups diced chicken
  • 1 cup flour
  • 2 cups low-sodium chicken or turkey broth
  • 1 chicken bouillon cube
  • 1/4 cup white wine (optional)
  • 1 cup heavy cream
  • Frozen peas (optional)
  • thyme, salt and pepper to taste

Preheat oven to 400 degrees.

  • Melt butter in a skillet or dutch oven. Add onion, carrots, peas, and celery, and cook until translucent (a couple of minutes.)
  • Add chicken and stir. Sprinkle flour over mixture and stir. Cook over medium heat for a couple of minutes, stirring constantly.
  • Pour in chicken broth, stirring constantly. Add in wine (you can leave this out if you’d like.) Pour in cream. 
  • Bring to a slow boil and allow mixture to cook and thicken for a few minutes. Add salt and pepper to taste (do not underseason), and fresh or dried thyme to taste. Do one final taste at the end and add what it needs.
  • Roll out crust so that it’s about 1 inch larger than the pan you’re using.
  • Optional - line casserole or pie pan with one of the pie crusts. (I like my pot pie to have double crusts)
  • Pour mixture into a casserole dish or deep pie pan
  • Place the crust on top of the pot pie mixture, and press crust into the sides of the dish. Cut vents in the top of the crust.
  • Bake for 30 minutes or until very golden and bubbly.
  • Allow to cool for a little bit before serving.

Read more...

2010 Reading List

Here is a running list of the books I am currently reading or have read this year.

I am always up for suggestions for new reading material.

Shutter Island - Dennis Lehane
The Apothecary's Daughter - Julie Klassen
The Happiness Project - Gretchen Rubin
Velveteen Rabbit - Margery Williams
College Girl - Patricia Weitz
Velva Jean Learns to Drive - Jennifer Niven
A Reliable Wife - Robert Goolrick
The Little Giant of Aberdeen - Tiffany Baker
What the Dog Saw - Malcolm Gladwell
Twilight - Stephanie Meyer
New Moon - Stephanie Meyer
Eclipse - Stephanie Meyer
Breaking Dawn - Stephanie Meyer
Midnight Sun (unpublished saga of Twilight series) - Stephanie Meyer
Nanny Returns: A Novel - Emma McLaughlin

Read more...

Project 365 Blog of the Week

I am going to highlight a project 365 blog each week that I love and whose shots has captured my attention.

This week its A Pile of Pics.

I think she has a wonderful eye for capturing the everyday in a beautiful interesting way and she is just starting to master her camera. I can't wait to see what she does as the year progresses.


Read more...

Project 52 - Week 1

Roosevelt and I attended a wedding last Saturday at the historic Hotel Bethlehem. I had respect for wedding photographers before this past Saturday, but after trying to take photos with my Nikon D3000 during the ceremony and reception I have the utmost respect for those that do event photography for a living. Throughout the evening I was struggling to change my settings in enough time to capture the moments I wanted and I got a lot of bad shots. It is so much harder to shot when people are moving! But I am determined to keep at and I think I got some nice pictures despite my limited abilities. While up there I was also able to get some interesting shots outside though the cold kept me from being out there longer. Of course I was able to capture some of my favorite model - Roosevelt. (And yes he has a Nikon D3000 also - we are turning into such  camera geeks).

Outside of the wedding I was limited to capturing shots around the house since I was stuck in corporate hell and I was also nursing a cold. But I did get an opportunity to make some homemade sauce which we enjoyed with my favorite quick and easy penne pasta. (I will post a recipe later)

Let me know what you think of my shots. I am open to criticism, praise, anything that will help me get better. This week I also started shooting in RAW and I definitely see a difference between that and JPEG.


Outside in the freezing cold taking pictures. Were we crazy? I nearly froze!


I love photos of architectural details.


I wish she had been looking towards me. She was the cutest little flower girl. She was a whirl wind on the dance floor and danced the whole night.


Slightly blurry - I told you I was struggling with capturing moving subjects.


The Happy Couple


My favorite model.


Roe had his first photography class this week. Here he is playing with his camera. I have been trying out different editing effects.


Making sauce. Its one of my staple recipes in our house. So easy!


My diet consisted of this for two days this week while I nursed my cold.


Trying to plan out what new items I want for the change of seasons.

Read more...
(never home)maker
OWP badge

  © Blogger template Shush by Ourblogtemplates.com 2009

Back to TOP