Related Posts with Thumbnails
Showing posts with label cooking. Show all posts

Experiments with Apple Pie

It seems like I have not done a food posting in forever. No I am not on strike from cooking its just that I haven't been experimenting with anything new or doing anything that fabulous.

Last week I was inspired out of the blue to make apple pie to go along with our pork chop dinner. Now granted I LUUUVVVVV apple pie but I have never made it before in my life. (Isn't that terrible?) The biggest deterrent has always been that I didn't know a great pie crust recipe, that is until I learned Pioneer Woman's recipe. Only since then have I felt I had a foundation for making good pie. So I decided to take another page out of her recipe book and try her Flat Apple Pie Recipe.

Now I will tell you I had a hard time with this recipe because I did not thoroughly read the directions. It requires  2 pie crusts and I used one. DOOOOHHHH! Which resulted in too much filling, which tore the crust , which made filling spill onto the baking sheet and caused a hot smoky mess in my kitchen.  So my filing could have been a little more caramelly (is that even a word but you know what I mean) but otherwise it was totally tasty. The recipe for the filling yields a filling that is just right in terms of taste - not too sweet not too tart. I only modified it a bit by adding cinnamon. I am definitely going to use the filling in more traditional pies as well.

And next time I will use 2 pie crusts!
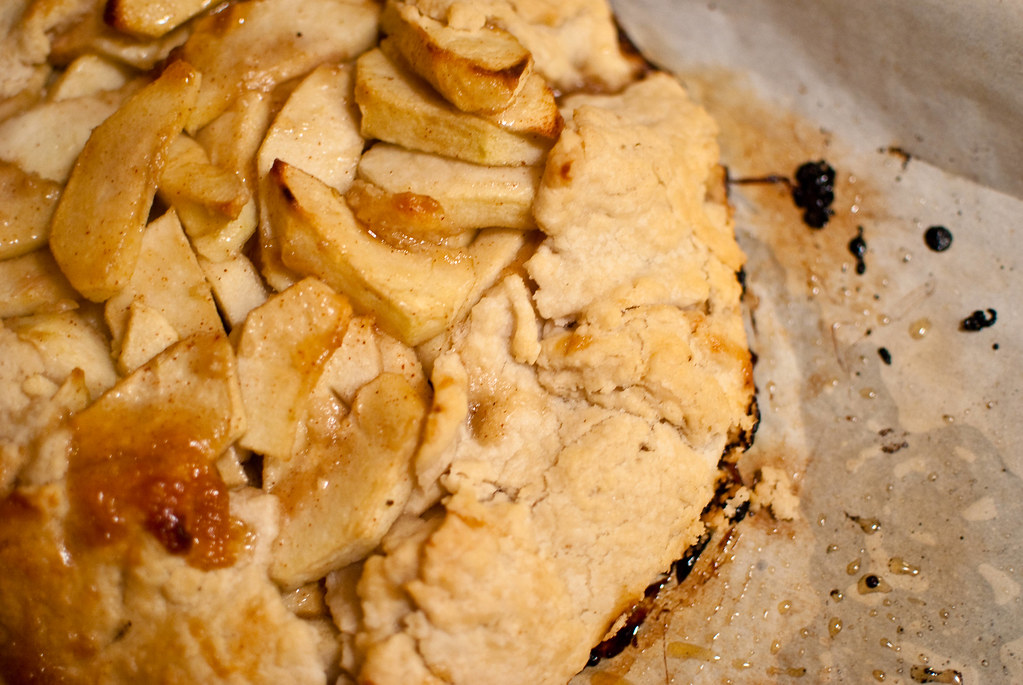
As you can see it is extra brown (burnt) around the bottom edges. But it was still really yummy.

Pioneer Woman's Flat Apple Pie


Ingredients

  • 5 peeled & sliced Granny Smith apples
  • 2 tbsp. flour
  • Juice of 1/2 lemon
  • 1/2 c. sugar
  • 1/2 c. brown sugar, packed
  • 1/4 tsp. salt
  • 1 recipe Perfect Pie Crust
  • 6 tbsp. butter
  • Cinnamon to taste


Method

1. Preheat oven to 375-degrees.
2. In a large bowl, stir together the apples, flour, lemon juice, granulated sugar, brown sugar and salt. Set aside.
3. Roll out two pie crusts into large circles. Place the circles on large baking sheets.
4. Place half the apple mixture on one crust and other half on the other crust.
5. Fold over the edge of each crust so that it covers 2-3 inches of the apple mixture. No need to be artistic - the more rustic the better.
6. Dot the tops of the pies with chunks of butter.
7. Bake for 30-40 minutes, until the filling is golden and bubbly. If the crust appears to brown too quickly, cover the edges with aluminum foil for the remaining baking time.
8. All to cool slightly, then slice into wedges with a pizza cutter.

Read more...

Hot Weather = Sweet Tea aka Liquid Diabetes


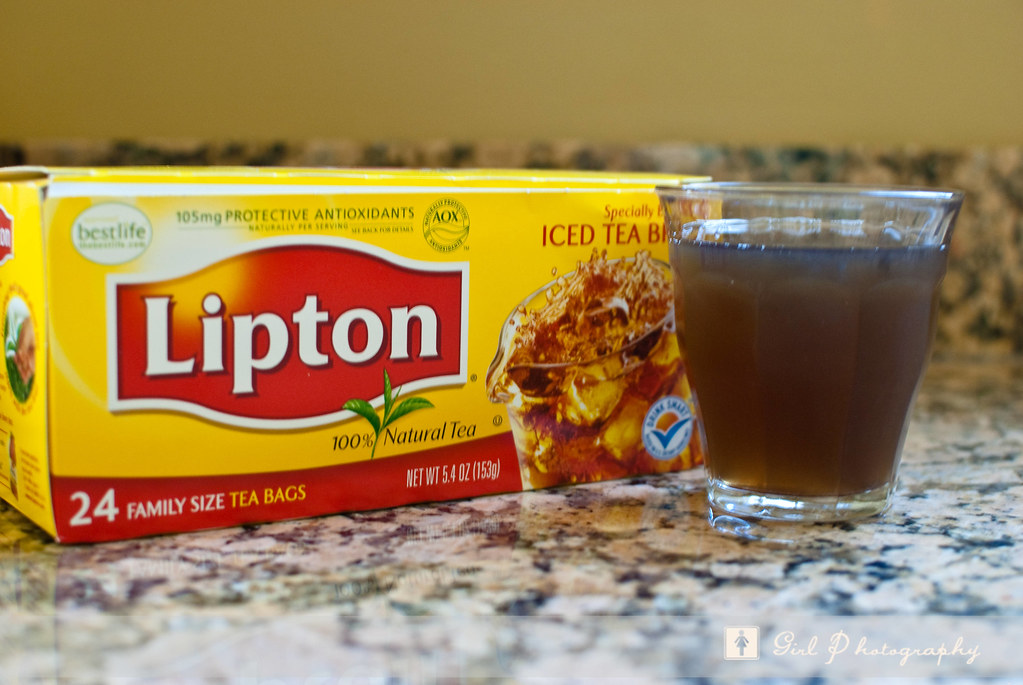
Anyone who knows me well knows that I do not indulge in caffeinated beverages or beverages that could potentially stain my teeth (red wine, strong tea, coffee). (Yes I am a clean teeth freak) I mainly drink water 98% of the time. But my one weakness is sweet tea which my husband and I jokingly call "Liquid Diabetes". And boy is it SWEET! Just the way both my husband and I like it. My husband's family is from West Virginia and my family from Georgia and Virginia so we were both raised on sweet tea being the drink of choice on hot days. And it just wasn't good if it wasn't done with a lot of sugar. The secret is to put the sugar in when its hot so that it dissolves. One of my pet peeves in restaurants is that they expect you to add in the sugar when its cold, then you have a pile of sugar at the bottom of the glass. YUCK!

I try not to make it too often but it is so easy and tasty. Plus for me it clearly falls into a comfort food category because it brings back fond memories.

So what is your drink of choice when the weather gets warm?

Read more...

Black Bean Soup


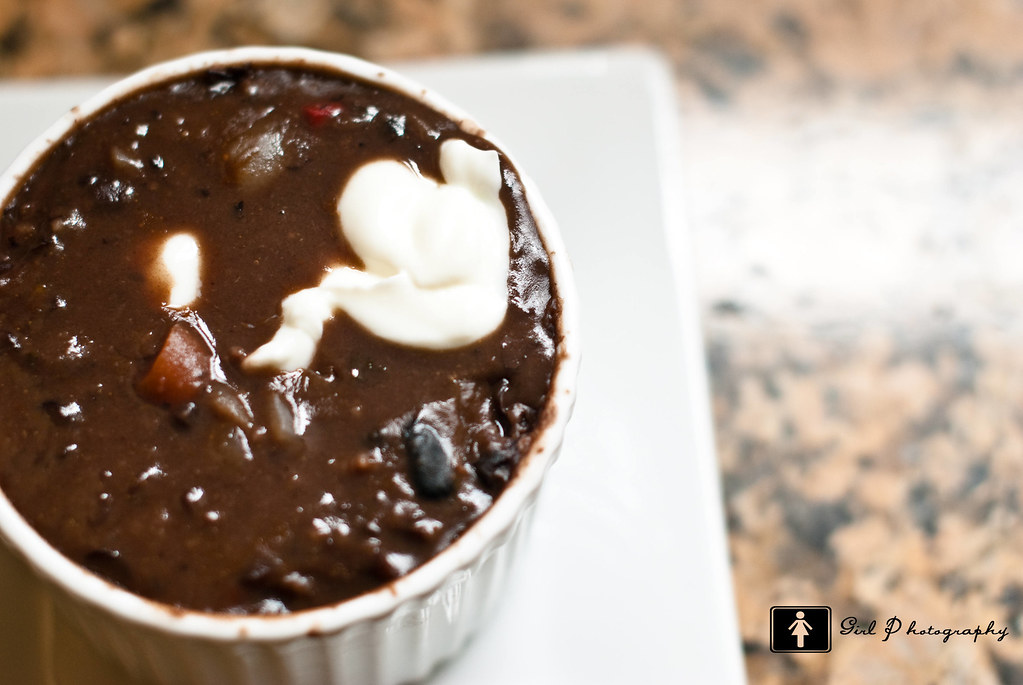
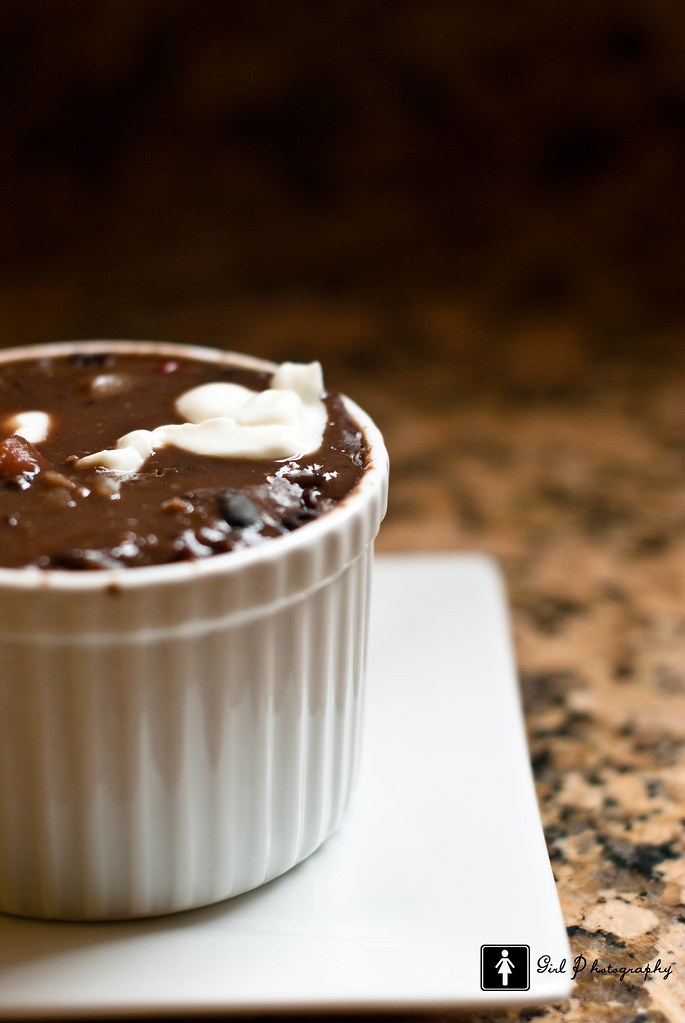
I developed a taste for black bean soup late in life. As a girl I would not touch beans swearing that kidney beans looked just like thumbs and totally dismissed all beans as disgusting. When I lived for a year in New Haven, CT and discovered Atticus Bookstore Cafe up the street from my apartment I became enchanted by black bean soup. They served a hearty black bean soup with fresh pieces of white bread with sides of butter and jam. YUMMMMM.

Ever since then I have been recreating my own version here at home making a different variation each time. However, I keep the basic ingredients the same chicken broth, rich black beans, onions, and carrots. From that foundation I build and make  a rich hearty soup. But the great part of it is that its 1) a healthy source of protein,  2) low calorie, 3) can easily be made vegetarian with the use of vegetable broth, and 4) can be made more hearty with the addition of meat.

Black Bean Soup

* Goya canned Black Beans (1-29 ounce can & 2- 15.5 ounce cans)
* 32 ounces of chicken broth (can also do half chicken/vegetable or all vegetable broth)
* Olive Oil
* Half a large onion diced
* 1-2 Diced carrots
* Garlic
* Smoked Paprika
* Chili Powder
* Ground White Pepper
* Kosher Salt
* Fresh Chopped Cilantro
* Southwestern Salsa

Other great additions that work well with this soup:
* Andouille Sausage
* Shredded cooked chicken breast
* Tomatoes (fresh or canned)
* Corn (fresh or canned)


Directions

  • Heat about 1-2 tablespoons of olive oil in large soup pot or dutch oven. Add in onions, garlic, and carrots. Cook until onion slightly translucent.
  • Add in paprika and chili powder to taste. Cook 1-2 minutes more.
  • Add in chicken broth and beans (undrained).  Cook for 10-15 minutes.
  • Add in salsa (if adding tomatoes and corn add in now), salt, and pepper. Cook 1-2 minutes.
  • Take half of beans from pot and process in food processor to puree. Add back into soup and cook for 10-15 minutes more. (Additionally I take a potato masher and mash some of the beans in the pot as well. If doing so would also add in meat at this time).
  • Taste and add additional seasoning if necessary. 
  • Add in hopped cilantro.
  • Serve with sour cream or shredded mexican cheese topping.
_________________________________________________________
Also in an effort to give more info on my photography here is some information on the pictures in this post.

Photo 1 : Taken with 50mm, f/2.5, 1/80 sec
Photo 2 : Taken with 50mm, f/2.5, 1/100 sec

Both photos were taken in RAW format and edited in Lightroom where they were adjusted for white balance, sharpness, contrast, and given a color boost.

Read more...
Hello Stranger!

Hello Stranger!

Yes I have been a little MIA this past week but for good reason. First my photography business has picked up and my calendar is filling up. Yeah!!!! Also I finally got a new car this week. Let's observe a moment of silence for Mini (Mini Cooper) she was much loved and a reliable companion to the end but it was time to put her to rest. I love my new car but it seems so big in comparison to what I had before and I truly miss my go chart handling ;(  Lastly, my 9-5 gig has also picked up , and hey a sister has to pay her bills, so that is always first and foremost.

But I am back with a new recipe. My sweet tooth has kicked in with a vengeance and the empty donut bag from tonight is full proof. (However, and some of you may hate me for revealing this, I am actually losing weight despite my sweet tooth binge. Crazy right? Once again I am just not eating enough calories through out the day to maintain my weight, which is equally as bad as over eating.) So Monday night I decided at 10 in the evening after coming back from dance class that I would make strawberry preserves. What the hell was I thinking? And me being someone who underestimates how long something will take was then up in the kitchen canning till about 11:30. And as if that wasn't crazy enough I decided while the cans were in for the final boil to just make oatmeal cookies for the hell of it. Why not take a full ride on the crazy train.

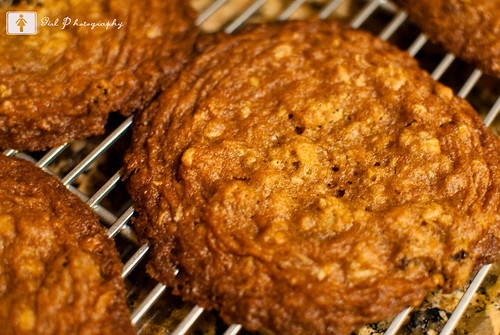
We have a ton of oatmeal left from granola craze so why not put them to use. I rarely eat oatmeal cookies and I am hard pressed to find one I truly enjoy but I go bat crazy for these. ( I ate oatmeal cookies for breakfast  the past two days. Does that count as my daily serving of grains and fiber?) And ironically enough it's the recipe that comes on the inside lid of the Quaker Oatmeal canister.  Nothing fancy or complicated. Just plain, easy, simple and good.


Vanishing Oatmeal Cookies (Raisins Optional)


Ingredients

  • 1/2 lb (2 sticks) butter  - Butter creates a flatter crispier cookie while shortening will give a higher lighter cookie. I prefer the flavor of butter and I also prefer the texture it gives the overall cookie.
  • 1 cup of firmly packed brown sugar
  • 1/2 cup granulated sugar
  • 2 eggs
  • 1 teaspoon vanilla
  • 1 1/2 cup all purpose flour
  • 1 teaspoon baking soda
  • 1 teaspoon cinnamon
  • 1/2 teaspoon salt
  • 3 cups uncooked Quaker Oats (quick or old fashioned) - I generally add the amount I see fit  but this is the quantity the recipe calls for, but I generally add less than this (2 - 2 1/2 cups).
  • 1 cup raisins (optional)
Preheat Oven to 350.
  1. Beat together butter and sugars till creamy
  2. Add eggs and vanilla; beat well
  3. Add combined flour, baking soda, cinnamon and salt; mix well
  4. Stir in oats and raisins
  5. Drop rounded teaspoons onto ungreased cookie sheet
  6. Bake 10-12 minutes or until golden brown
  7. Cool and remove to wire rack.

Read more...
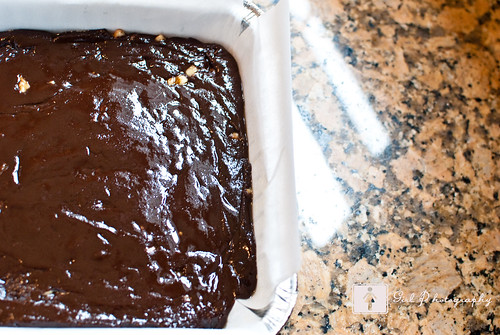
My Gosh These Are Good Brownies

The pan right before being placed in the oven.

After seeing Shauna of Piece of Cake recipe for brownies I knew I had to try them. OMG, they did not disappoint. They were rich, dense, moist, and fudgey. So rich in fact that I had to share and gave half the pan to my contractor (I just couldn't have all that temptation in the house).

Read more...
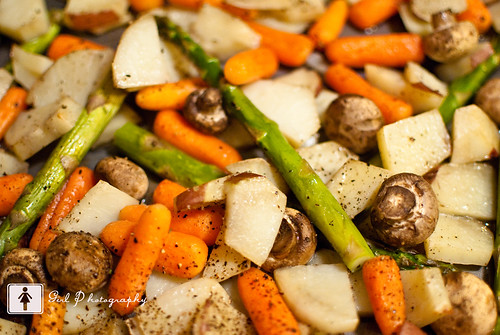
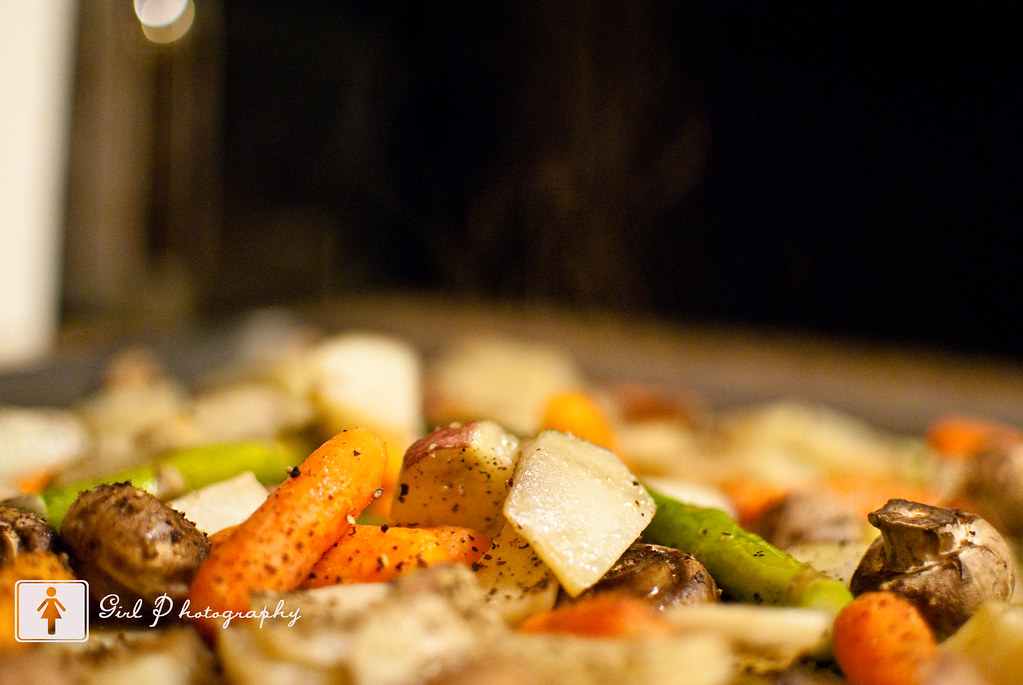
Easy Peasy Vegetables


This is one of my favorite dishes to make and its also good for you. As I was saying to my husband tonight it is a total departure from how I ate vegetables as a girl. Being raised in the tradition of southern cooking vegetables weren't thought to be properly cooked unless it involved some form of animal fat, smoked meat preferably pork, oil, or butter. But as an adult I have broken with tradition in an effort to eat and live healthier. This is how I prepare our vegetables 9 times out of 10 and the great thing about it is that it works well for a variety of vegetables. I have made this with squash, carrots, asparagus, onions, the list goes on with the simple additions of extra virgin olive oil, kosher salt and pepper for seasoning.


Easy Oven Baked Vegetables

Ingredients
  • Sliced vegetables (carrots, potatoes, mushrooms, asparagus, onions, squash, etc) My favorite combination is carrots, potatoes, mushrooms, and onions
  • Extra virgin olive oil for grilling
  • Kosher salt
  • Pepper
Directions
  • Preheat oven to 400
  • Place vegetables on baking sheet and sprinkle with olive oil. Season with salt and pepper. (Tip: If using potatoes I try to cut the potatoes into smaller pieces so they cook at the same rate as the other vegetables.)
  • Cook until vegetables are tender and done. Fork will easily pierce vegetables.
Note: I was super excited to have this tonight since my diet has been so crappy of late and I have been craving fresh vegetables. But I guess it may have been cancelled out by the brownies I made using Shauna's recipe from Piece of Cake.

Read more...
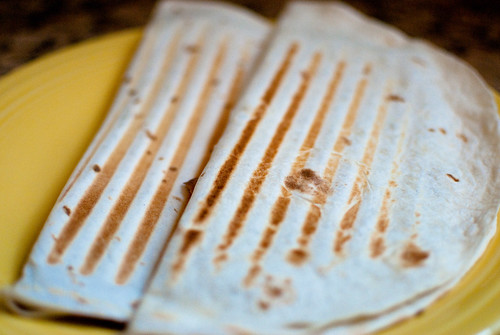
Beans Anyone? Part II


I am seriously behind on my food posts. I have been meaning to post about one of my absolute favorite quick meals in our house - black bean quesadillas for about two weeks.

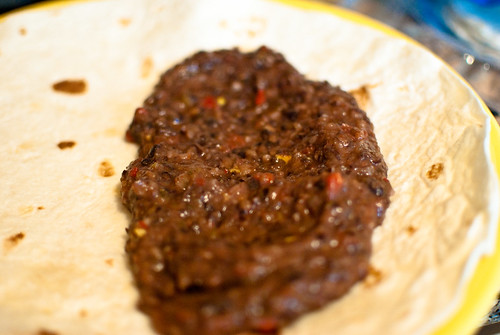
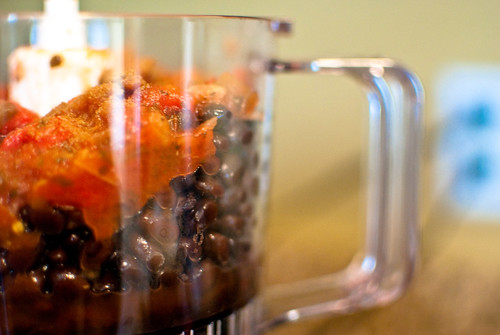
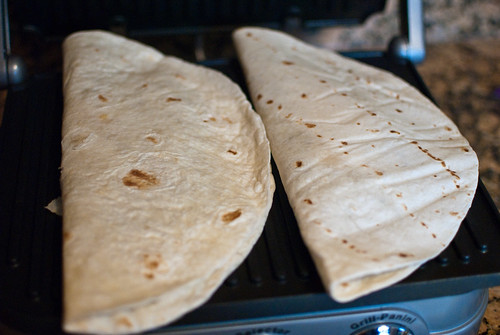
Remember when my husband bought home industrial sized cans of beans. Well it wasn't just kidney beans but black beans also. After the chili I still had one large can of black beans left. So I decided to make quesadillas. I started making these about two years ago after getting tired of paying for them at Whole Foods. I simply took their label of ingredients and improvised my own with my food processor and Cuisanart Griddler (I used to use the Foreman Grill before we got the Griddler).


I like the fact that they are easy and fast to make which on nights when I have had a long day come in handy. I sometimes make the bean filling ahead of time and freeze for nights just like that. The other plus is they are completely vegetarian and gives us reprieve from eating meat. (Its nice to mix it up sometime)


Black Bean Quesadillas


  • can of black beans
  • salsa (I use a hot southwestern blend since it gives it more flavor and texture)
  • minced garlic
  • cumin
  • kosher salt
  • chili powder
  • large flour tortillas
  • Blend of mexican cheese grated
  • hot sauce (optional)
  • cilantro (optional)
  • corn (optional)

  1. Rinse beans and pre cook in small saucepan for about 5 minutes
  2. Add beans, salsa, garlic, seasonings (cumin, chili powder, salt, hot sauce), cilantro to food processor. Pulse until bean mixture is a thick paste. I prefer it to have some texture and not be completely smooth
  3. Spread onto one half of flour tortilla. Sprinkle with cheese.
  4. Fold tortilla and place on grill and cook until tortilla has sear marks about 3-5 minutes. Be careful not to overfill since the filling spreads as it cooks and can spill out of the quesadilla.

Read more...
Warning - Could Cause a Diabetic Coma

Nothing this good is ever good for you.

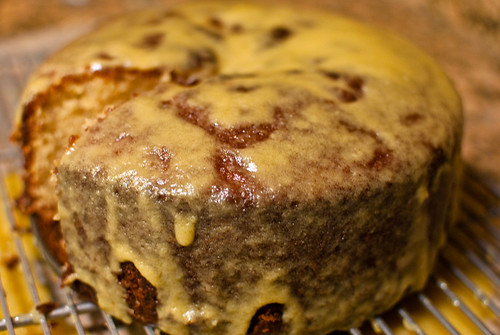
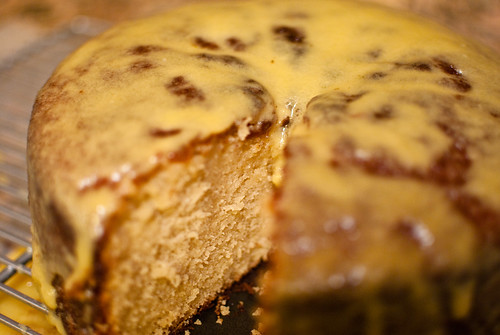
I am on this comfort food kick this week (and as I write this I am chowing down on a bowl of PW Chicken Potpie) and last night I tried my hand at Southern Praline Cake.  Consistent with the southern tradition this cake is loaded down with a ton of butter and sugar which makes for good eating (and early heart disease - this is not a cake for faint of heart or those watching their figure).

Pralines - one of the famous treats of Savannah

I have been infatuated with pralines ever since our honeymoon in Savannah which seems to be the praline capital of America. I instantly became enamored with there rich buttery sweet taste, however, Roe finds them disturbing to his palette. He thinks they are just too sweet. But when you are raised in a household where sugar water and sweetening orange juice with sugar is the norm you have a high tolerance for sugar.

I bought back two boxes of pralines from our honeymoon which I have safely stowed away in our freezer. I ration them out to myself to eat with ice cream but I have really been saving them to develop a cake recipe with. I think it would be an interesting taste and texture to have bits of praline either in the cake or icing. I have been unsuccessful in finding a recipe that is in line with my imagination but I may have come across the next best thing.


The recipe directions are for a layer cake but I opted to forgo the layers. next time I will probably make it in a tube pan and stick with the glaze method of icing.


The icing for this Southern Praline Cake when prepared properly draws inspiration from the candy in look and flavor. The icing has that same rich buttery taste and smell as the candy.  But warning it takes 3/4 cup of butter for the icing to achieve this feat. (The mere thought of that much fat could stop your heart). This cake has not the quite the density of pound cake and is heavier than your average layer cake. Yet it is rich with flavor due to the brown sugar and very moist. The cake really reminds of the cake I used to get as a girl from the older southern ladies at bake sales and community events. Rich, flavorful and dense.

My icing turned out to be more like a glaze since I substituted skim milk for evaporated milk in the original recipe. (I was too lazy at 9 last night to run to the grocery store). Ordinary milk has more moisture so its harder for the icing to get that thick spread  consistency that the recipe intends. But sometimes a faux pas makes for good eats and I think the cake benefited from the glaze as opposed to the icing. I think the icing would have been too overwhelming in sweetness for the cake. Also I omitted the pecans since I used my last store of pecans on granola the other week. But I think they would add an excellent flavor to the cake but sans nuts was tasty as well.

Since learning of how much butter was used in the making of this cake Roe has refused to eat anymore outside of the huge piece he had today (he is in training for a race). And to prevent another red velvet fiasco I have quickly dispensed with freezing 3/4 of the cake.

And because I like you all so much :

Warning only bake this if you have friends and family to share it with or you don't mind putting on an extra 3-5 pounds.

The recipe is from grouprecipes.com and can be found here.

Southern Praline Cake


  • 1 cup butter or margarine, softened
  • 1-1/2 cups Granulated Sugar
  • 1 cup Light Brown Sugar, firmly packed
  • 4 large eggs
  • 3 cups all-purpose flour
  • 1-1/2 tsp. baking powder
  • 1/4 tsp. baking soda
  • 1/2 tsp. salt
  • 1 cup milk
  • 2 tsp. vanilla extract
  • Grease and flour three nine-inch round cake pans and preheat oven to 350°F. 
  • Cream the butter or margarine with both Granulated Sugar and Light Brown Sugar until very light and fluffy, then add the eggs, one at a time, beating well after each addition. 
  • Sift the flour with the baking powder, baking soda and salt and add to the batter alternately with the milk, beginning and ending with the dry mixture. 
  • Stir in the vanilla extract. 
  • Divide batter evenly among the prepared pans and bake in the center of the preheated oven for twenty-five to thirty minutes or until a wooden pick inserted in the center of the layers comes out clean. 
  • Cool layers in their pans over a rack for ten minutes, then loosen and turn out layers directly onto racks for cooling. Cool layers thoroughly before icing.
  •  Recipe yields a nine-inch, three-layer cake.


Southern Praline Icing

  • 3/4 cup butter or margarine
  • 1 cup Granulated Sugar
  • 1/2 cup Light Brown Sugar, firmly packed
  • 4 large eggs of yolk
  • 1 large can (12 oz.) evaporated milk
  • 2 tsp. vanilla extract
  • 2 cups chopped pecans
  • Melt the butter or margarine in a large saucepan over medium heat. 
  • Remove from heat, then stir in Granulated Sugar and Imperial Light Brown Sugar. (Sugars will not dissolve). 
  • In a separate bowl, whisk the egg yolks with the evaporated milk until smooth, then whisk this mixture into the saucepan with the sugar mixture. 
  • Return saucepan to a medium heat setting and cook, whisking constantly, until mixture is thick, shiny and caramel-like, about fifteen to twenty minutes. 
  • Remove from heat and stir in vanilla extract and pecans. 
  • Cool icing to a good spreading consistency (about thirty minutes), then spread evenly between cooled cake layers and over the top and sides of the cake. 
  • Recipe yields icing for a nine-inch, three-layer cake.


Read more...
Wouldn't You know it


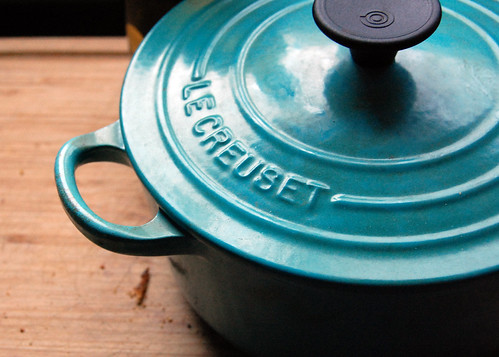
Last week after seeing this recipe posted by Ashley at (never home)maker I decided to bite the bullet and get a Le Creuset dutch oven. I have been on the fence for a while but this just pushed me over to the other side and with all the cooking I do I thought it would not go to waste.

Well I am not going to pay the ridiculous full price they charge for their products. Le Creuset is tres expensive. Plus I see them in Marshall's and Home Goods all the time at half the retail price.

However, wouldn't you know when I stopped in there this weekend to pick one up there were none. 0. Nada. Zip.

Ain't this a blip?! When I am not interested in getting one it seems like they have a million and one of these on the shelf. However, lo and behold on the day I am there to get one they are no where to be found.

Now the waiting and stalking begins.

Thanks Home Goods/Marshalls.

Read more...

I finally got it - how to make good mashed potatoes


This past Thursday after a week of subsisting on granola and practically nothing else, (I loose my appetite when I am stressed) I decided that I was going to make myself a fabulous down home comfort food rich meal. I had a hankering for mashed potatoes, caramelized onions, meatloaf (recipe to follow in future post), and string beans.

In the past I have had mixed results with my mashed potatoes. Sometimes they have turned out fabulous and other times not so fabulous. See most of my comfort food cooking has been learned through observation of my grandparents who were both wonderful cooks. However, I did not grow up eating mashed potatoes. The only time we had potatoes were as home fries with breakfast and even that was rare. My grandfather came from down south and the choice of starch where he was from was rice. So we had rice every day. And the ironic thing is my husband has to practically beg me to make it now and if it wasn't for the fact that we have a rice cooker I wouldn't dream of making it.

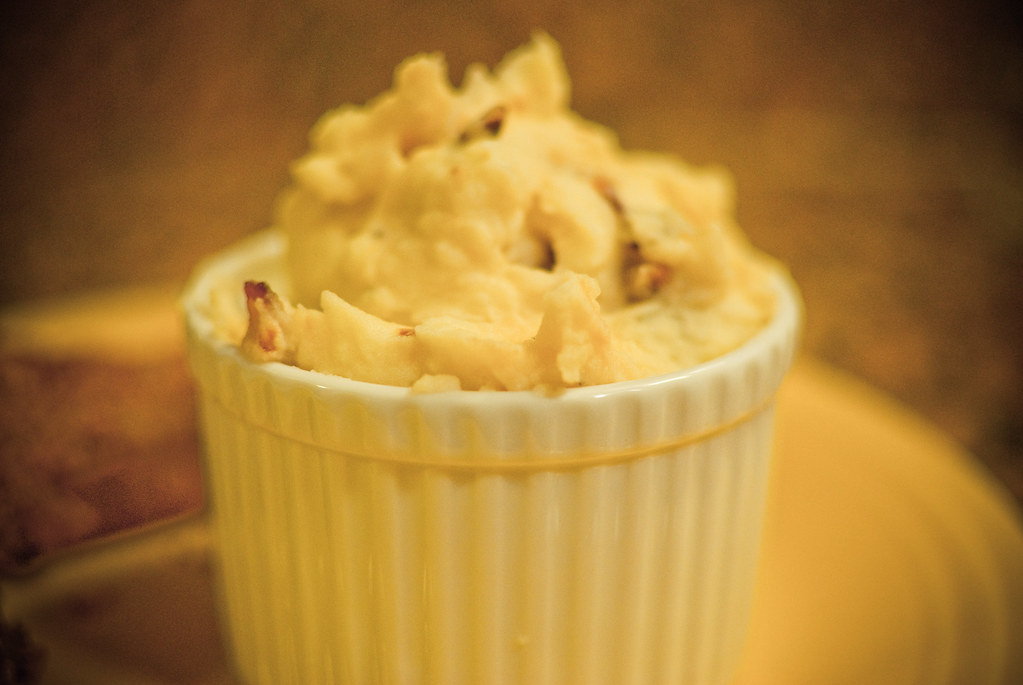
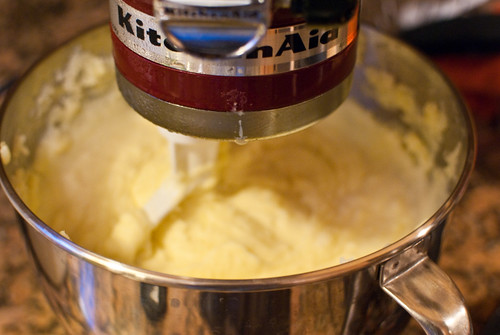
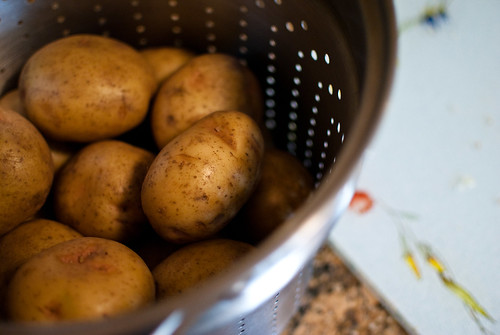
Back to the potatoes. I love their starchy goodness, especially when they are creamy and loaded down with butter, salt and pepper. But I have never properly learned to make them till now. Thank you Martha!  The secret is using Yukon gold potatoes and my Kitchen Aid mixer. Not a potato ricer the Kitchen Aid mixer. I have never made potatoes so smooth  or as creamy as the ones that came out of the mixer. No lumps what so ever.


And with the addition of the caramelized onions I was running through the house in glee. That just put them over the top. Roe thought I had lost my mind. But I knew they were good when he went back down stairs at midnight for a plate of mashed potatoes.

Mashed Potatoes (adapted from MS)


  • 2 pounds russet, Yukon gold, or long white potatoes (Yukon Golds were perfect)
  • 1 tablespoon salt, plus more to taste
  • 1 cup milk, or cream (I used skim milk and they came out great, next time I will try cream)
  • 4 tablespoons unsalted butter 
  • 1/4 teaspoon freshly ground black pepper


Peel and cut potatoes into 1 1/2-inch-thick slices. Place in a medium saucepan. Cover with cold water; add 1 tablespoon salt. bring to a simmer. Keep potatoes at a low simmer until a knife slips in and out easily. Drain potatoes in a colander. Place milk in a small saucepan over medium-high heat.

Transfer hot, drained potatoes to bowl of an electric mixer fitted with the paddle attachment. Mix on medium-low speed, until most lumps have disappeared, about 1 minute. Add butter; mix until blended. On low speed, add hot milk in a slow stream, then add pepper and salt to taste. Mix to combine.

Fold in caramelized onions.


Caramelized Onions

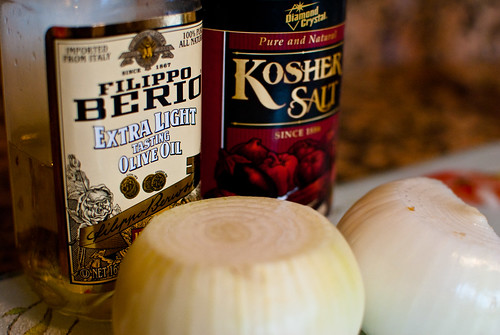
  • 1 1/2 large white onions sliced
  • 3 tablespoons of olive oil
  • pinch of salt
  • pinch of sugar (optional)
  • White wine

Heat olive oil in pan. Add in onions and stir to coat them with oil. As onions cook they will begin to become translucent, add in pinch of salt and sugar (the salt will aid in caramelization). Onions will begin to brown. Continue to stir. If they stick to pan deglaze with a small amount of wine. Cook until onions are desired color and taste. Onions will take about 20 minutes to caramelize.

Read more...

Jambalaya - It's a Party in your mouth

I always think of jambalaya as a party for your mouth. Its a mixture of everything I love - rice, meat, tomatoes (and to think I wouldn't touch tomatoes as a girl I thought they were yucky), hot spices all dancing around on your tongue. Even the word sounds festive.

Some people make it with chicken, some make it with shrimp, since I love meat in all its many forms I put chicken, shrimp, and sausage in my version. I try to make it whenever shrimp goes on sale and its a favorite of both myself and my husband.


Jambalaya

Ingredients

  • 16 ounce bag of long grain rice
  • 1 1/2 lbs of shrimp
  • 1 lb of andouille sausage
  • 1 extra large boneless skinless chicken breast
  • 6 oz can of tomato paste
  • 14.5 oz can of diced tomatoes
  • 1/2 large onion diced
  • 2 celery stalks diced
  • 1/2 large green pepper
  • minced garlic
  • Cajun seasoning
  • hot sauce
  • 2 bay leaves
  • Kosher salt
  • ground white pepper
  • paprika
  • olive oil
  • 2 1/2 cups of chicken broth
  • 2 cups of water

1. Season chicken beast with cajun seasonings and cook till done. Dice into bite size pieces. Set aside.
2. Cook sausage and dice into bite size pieces. Set aside.
3. Peel and clean shrimp. Set aside.
4. In large pan or dutch oven heat olive oil (about a tablespoon). Add minced garlic, peppers, onion, and celery to pan. Cook until tender and onion is slightly translucent.
5. Add in tomato paste and rice. Cook about 3 minutes till rice is well coated.
6. Add in diced tomatoes with liquid, chicken broth, water, seasonings,  bay leaves, sausage, and chicken.
7. Cover and cook until liquid is nearly absorbed and rice is almost done. (You may have to add additional water as it cooks). Stir occasionally during cooking to prevent rice from sticking to bottom of pan.
8. Add in shrimp
6. Stir in shrimp and cook until shrimp are pink in color and rice is done.

Read more...

Can you cook with Pickles?

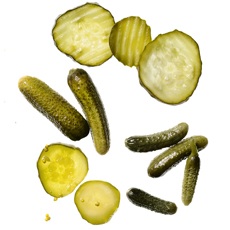
courtesy of Food Network

Food Network Magazine is asking just that question.

For this month's secret ingredient contest the star food is pickles.  I was racking my brain Saturday while out with Roe trying to think of how I could think outside the box and use pickles not just as a condiment but as a main ingredient.

If you are interested, the link to the contest rule and entries are here. Deadline is March 5th.

Oh yeah and grand prize is $500. Does that make it easier?

Read more...

Blueberry Muffins Part Deux

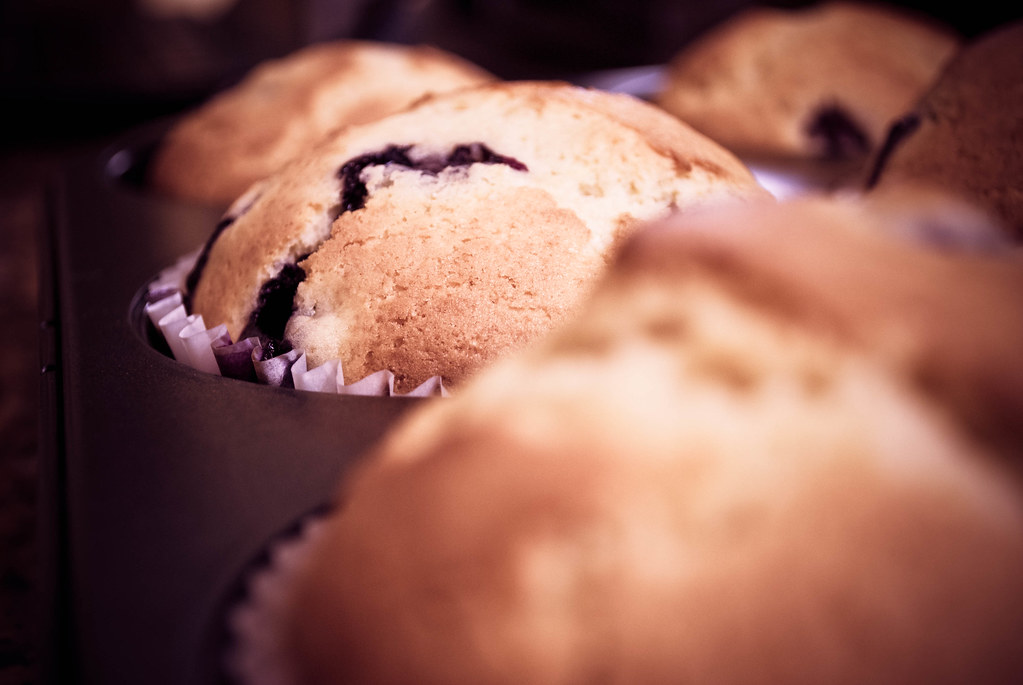
Will I ever reach "Blueberry Muffin Nirvana"?

Yes, I was at it again this weekend. I am continuing on my quest to find blueberry muffin Nirvana.  This weekend I got a little closer but the direct path to enlightenment still alludes me. (You may be subjected in the next couple of weeks to a whole series of blueberry muffin posts. Didn't I tell you that I am a perfectionist and once I get something in my sights I am like an old dog with a bone and won't let go.)


I gave Ms. Martha's recipe a try this go round. (Which you can find here in my earlier post on blueberry muffins.) Now Ms. Martha's recipe took a very non-muffin approach to mixing the batter, instead it relied on the creaming method which is the foundation of most cakes. Thus the batter was more dense then the Joy of Cooking recipe and shall I say more pound cake like in its consistency. While the recipe did yield a sweeter muffin because of the higher ratio of sugar, the muffin did not keep as well next day in terms of taste due to the lower butter content. Overall it was better than the first but still not good enough. I am a little disappointed in my girl Martha because I was hoping that she would knock it out of the park.

Ms.Martha's recipe was better but still not the BEST  ;(

Next I will try Shauna's recipe from Piece of Cake.

update : Crazy thought  ..... I am thinking I know "enough" (ie I have enough resources at my fingertips) to understand the chemistry of baking and the structure of a muffin recipe. Should I just forge ahead and develop my own recipe? Hmmmmmm.

Read more...

It may be chilly outside but it's chili inside

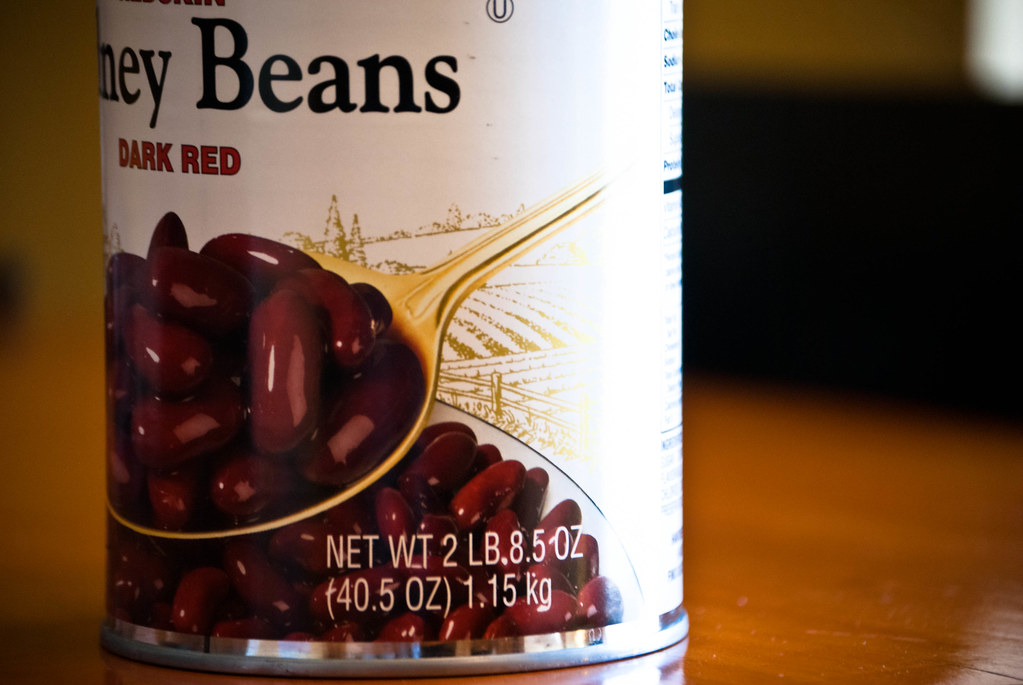
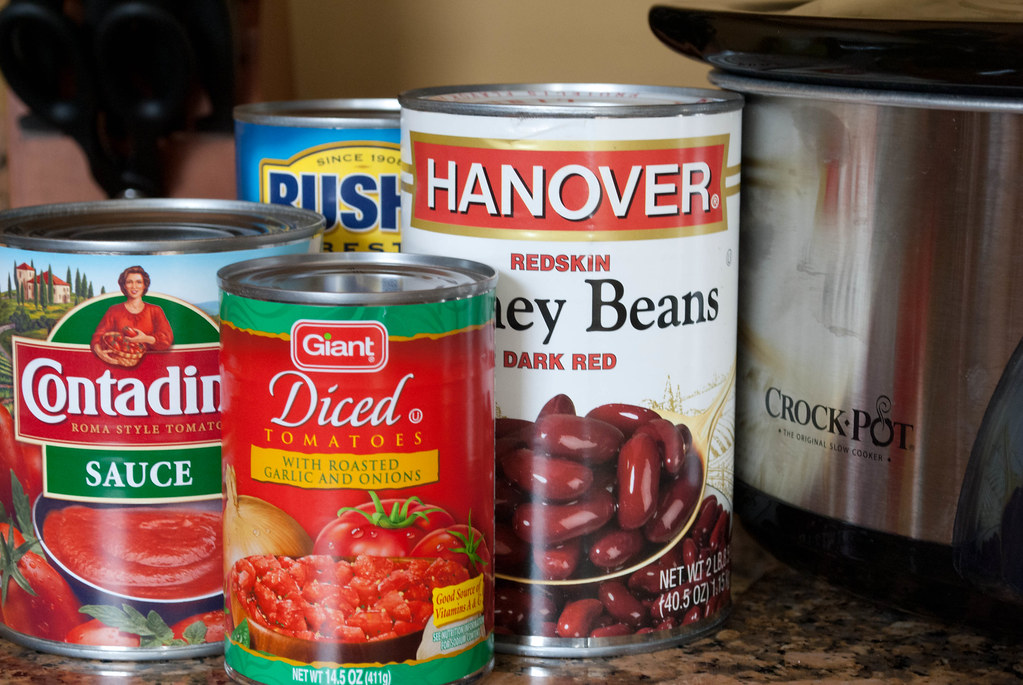
As you remember I had the dilemma of this


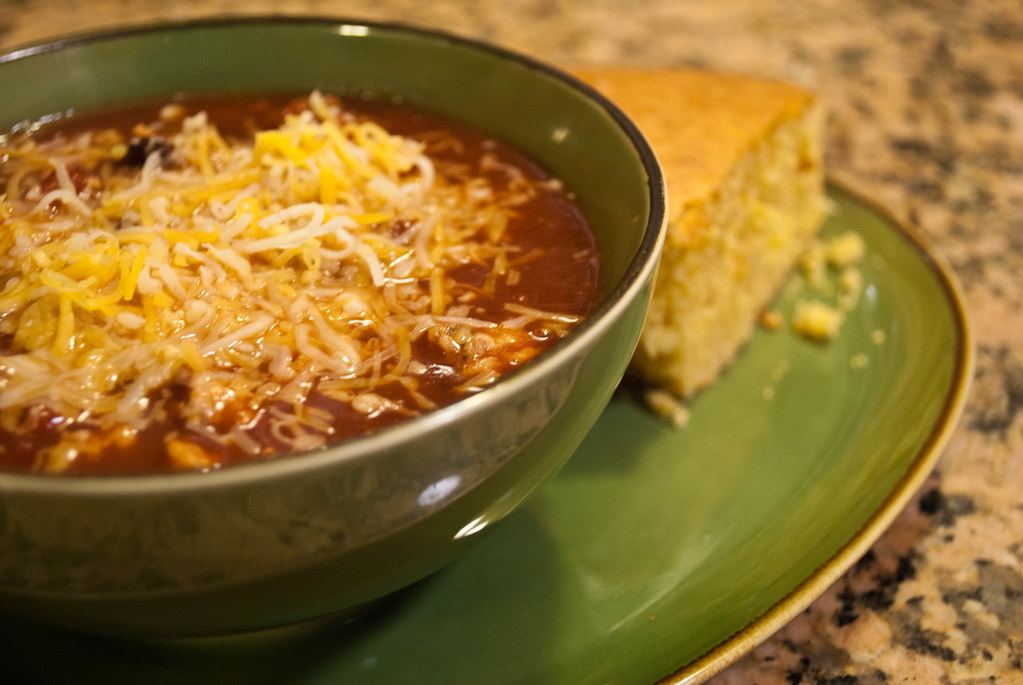
So when you have 2 lbs of kidney beans the only thing you can do is to make 5 quarts of chili!

The week of Snowpolycalpsye not only were we up to our necks in snow but in our house we were up to our necks in chili. While chili is a winter staple in our house I don't think we will be having it for a while given the massive quantities we had to eat last week. 

What I love about chili is its simplicity. Beans, Meat, Tomatoes. From those simple ingredients there are so many variations. I don't think I ever make my chili the same way twice. I may use different beans, substitute vegetables like squash and zucchini for meat, use ground turkey instead of beef, etc. The possibilities are endless. 

I am going to share with you my basic starter recipe with some minor notes as to what I modified to get the version we ate last week.  (Once again I don't have exact quantities since I cook to taste - sorry ;(  I know I need to start doing a better job about measuring while cooking.)


Chilly Outside Chili


Ingredients

  • Canned Tomato Sauce
  • Canned Diced Tomatos (sometimes I buy the ones that are already seasoned)
  • Ground Meat (For this version I used ground turkey but the traditional is made with ground beef)
  • Sausage (I like our chili meaty and usually add sausage. I use different varieties of italian sausage depending on what taste I am going for - sweet, mild or hot.)
  • Beans (Traditionally made with red kidney beans (dark or light) but I use a variety of other beans as well - black, chickpeas, white, etc. For this I used black and red kidney beans.)
  • Diced Onion (red or white)
  • Diced Green Pepper
  • Garlic (optional)
  • Cumin
  • Chili powder
  • White pepper
  • Hot Sauce
  • Brown Sugar
  • Kosher salt
  • Bay leaf
  • Beer (I use a lager. I don't use the whole bottle, probably only about 1/5-1/4 of the bottle)
  • Cheese 
  • Sour Cream

  • Add in beans, tomato sauce, and diced tomatoes to crock pot set to high. Add in seasonings (cumin, chili powder, white pepper, bay leaf). Let cook for about 1 - 1 1/2 hours.
  • While chili starter is going in crockpot cook ground meat, adding in any desired seasonings to meat. Drain from fat.
  • Cook sausage. I prefer to bake the sausage in the oven. Let rest and pat off any excess oil (especially if cooking in frying pan). When sausage has cooled slice into bite size pieces.
  • Add in meat, diced onions, diced green peppers, and garlic to crock pot. Also add in beer, hot sauce, and brown sugar. Taste and add in any additional seasonings (cumin, chili powder, etc).
  • Let cook another 1 - 1 1/2 hours.
  • Serve with grated cheese and sour cream.

Read more...
I've gone granola


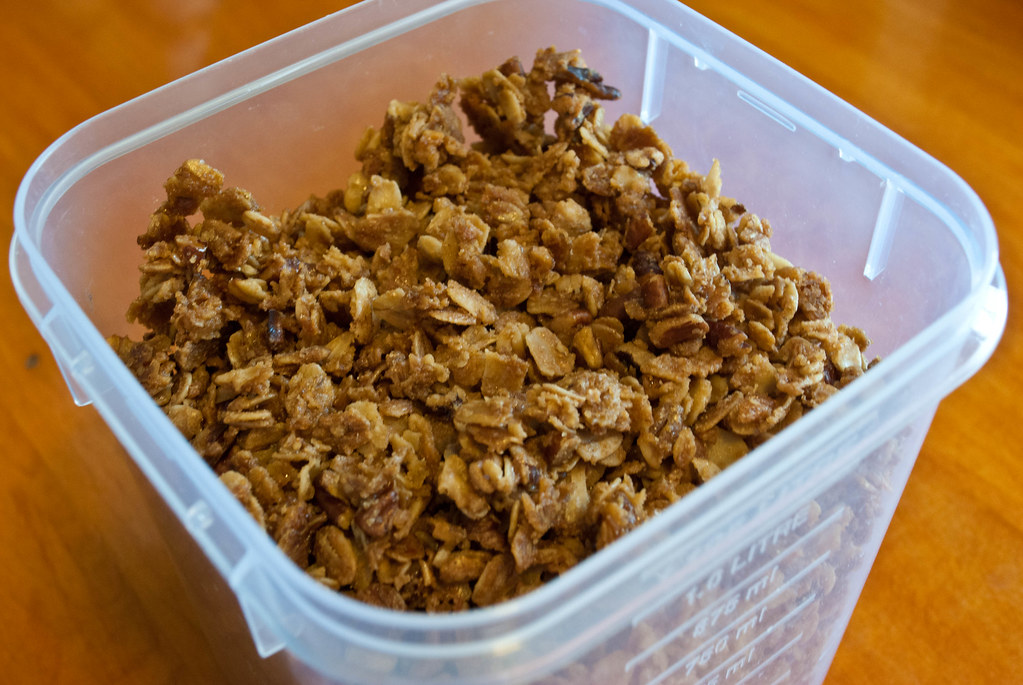
I've gone granola and I like it.

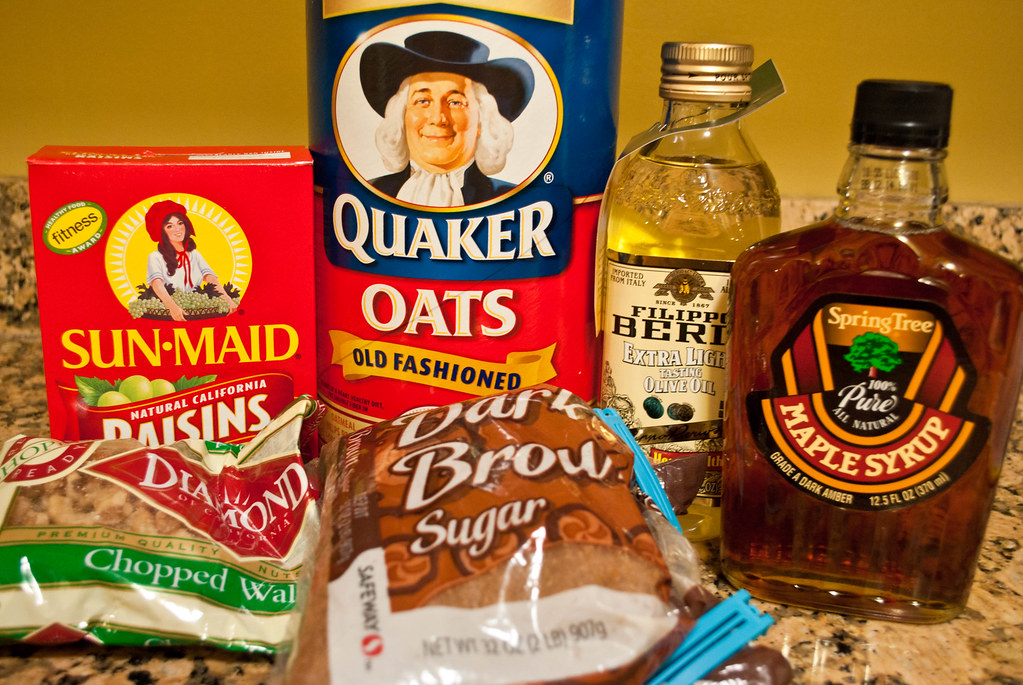
I got inspired to make my own granola after seeing a couple of posts for recipes around the blogsphere. After researching through my cookbooks and on the internet I decided to use as a foundation a recipe I found on the Martha Stewart website. The recipe is Farmhand's Choice Granola and comes from Nekisia Davis of Early Bird Foods  who sells her granola mixes locally at various spots in Brooklyn NY. What I loved about the recipe is that it uses maple syrup for flavoring and extra virgin olive oil. Most of the recipes I found used vegetable oil and I thought the olive oil would definitely make it lighter and give it better flavor. (Oh how I wish I could have one of the oils from Fiore Artisan Oils and Vinegar that Erin over at Domestic Adventure is giving away.) Plus there was a video accompanying the recipe which is always a plus and super helpful.

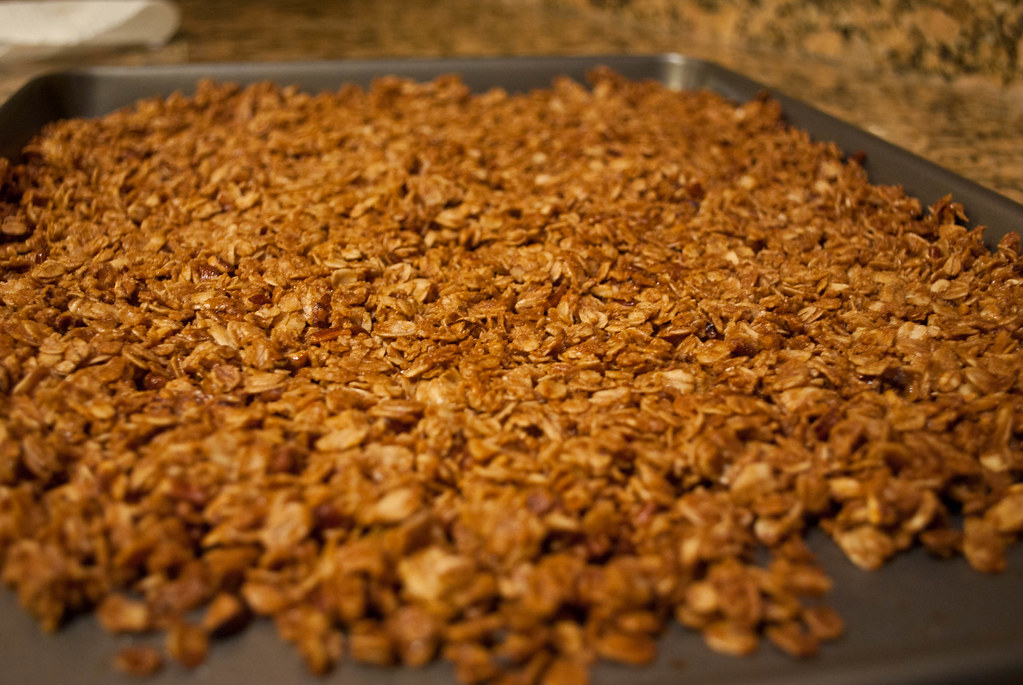
If you want the full recipe just click on the link above. I am not a fan of too many seeds and coconut in my granola so I simplified the recipe to better fit our taste.  But that is the beauty of granola you can do so many different mix ins to get just the way you like it. The recipe yields a sweet, yummy, flavorful granola. It is smells divine while it is baking in the oven.


Granola (adapted from Early Bird Foods recipe courtesy of MS website)

Ingredients
  • 3 cups old-fashioned rolled oats
  • 3/4 cup pure maple syrup, preferably Grade A
  • 1/2 cup extra-virgin olive oil
  • 1/2 cup packed dark-brown sugar
  • 1 teaspoon of Kosher Salt
  • Pecans, coarsely chopped (I decided to o with pecans after I took the photo because I thought they would be a better compliment to the maple syrup flavoring)
  • Cinnamon to taste

  1. Preheat oven to 300 degrees.
  2. Place oats, pecans, syrup, olive oil, sugar, cinnamon, and 1 teaspoon salt in a large bowl and mix until well combined. 
  3. Spread granola mixture in an even layer on a rimmed baking sheet. Transfer to oven and bake, stirring every 10 minutes, until granola is toasted, about 45 minutes.
  4. Remove granola from oven. Let cool completely before serving or storing in an airtight container for up to 1 month. (If you would like to add raisins, craisins, or dried fruit you can do so after it has cooled.)

Read more...
You have to rub them - secret to good ribs


The secret to good ribs is a good rub. Now up until about two years ago I knew virtually nothing about making BBQ, I only knew how to put my bib on and get at those tasty morsels of succulent meat. That was until I met my husband and lo and behold like every man he felt the call to cook meat outside over an open fire.  Well at the exact same time my husband was looking into getting a grill the Martha Stewart Magazine published an article about BBQ and making meat rubs. ( Makes me think of the Buddhist saying I read in the book the Happiness Project - "When the student is ready, the teacher appears") Since then I have been experimenting with different rub recipes.

Around Christmas I noticed that pork was on sale at excellent prices. (Is this because of the glut in hams that time of year so the rest of the pig parts are on super sale?) So I was able to pick up a huge pack of pork ribs at an awesome price. Just because it's not warm outside doesn't mean you can't indulge in BBQ.  I remember as a girl my grandmother made BBQ in the oven during winter and while you may not get that off the grill flavor it is still tasty.


A rub is a blend of spices and herbs that will give your meat more flavor. They should be applied the day before the meat is actually cooked and then the meat is cooked with the rub in place. When we BBQ our ribs we still slather them down with BBQ sauce, my husband and I like them wet and messy.

Now to my dismay I am not able to locate the MS article where I originally read about rubs but Joy of Cooking has a wonderful collection of recipes.

For my rub I use these basic ingredients and I just wing the proportions to my liking:
  • Brown Sugar
  • Paprika
  • White Ground Pepper
  • Kosher Salt
  • Cumin
  • Chili Powder
  • Ground Black Pepper
Here are some tips to cooking ribs in your oven as opposed to on the grill:
  • Cook them for a long period on a low temperature (350)
  • Cook covered with aluminum foil for about 1 1/2 hours. To get them to the point where the meat is falling off the bone they will have to cook longer and I suggest cooking at 300 with the covered foil for at least 2-3 hours.
  • Uncover and then start to baste every 10 minutes with sauce for at least an hour

And to serve a reference here is the recipe from Joy of Cooking for their Southern BBQ Dry Rub. If you get a chance look up there other rub recipes as well, they may inspire you to create your own. Now I have to work on perfecting my sauce!


  • 1/4 cup packed brown sugar
  • 1/2 cup sweet  or hot paprika
  • 1/4 cup chili powder
  • 2 tablespoons ground red pepper
  • 2 tablespoons of cumin
  • 1 teaspoon of mace
  • 1/4 cup salt
  • 1/4 cup cracked black peppercorns

Read more...

Shrimp New Orleans Style


Shrimp was on sale the other week at the market (noticing a pattern here) and I decided to make what I call Shrimp Creole, a dish I started to make many moons ago in graduate school. It is my take on the traditional Shrimp Etouffe.

It is yummy, spicey, and really hits the spot.


Shrimp Creole
  • 1 1/2 lbs of large or jumbo shrimp
  • 1 lb andouille sausage
  • 1/2 medium green pepper
  • 1/2 medium red pepper
  • 2 stalks of celery
  • 1/2 medium red onion
  • 1/4 cup of butter
  • 1/4 cup of flour
  • 8-12 ounces of canned tomato sauce
  • 29 ounce can of seasoned stewed tomatos (I used Itlalian seasoned)
  • minced garlic
  • paprika
  • thyme
  • hot sauce
  • ground white pepper
  • creole/cajun seasoning (sold in spice section of supermarket)
  • kosher salt
  • ground black pepper
  • Worchestershire sauce
1. Cook sausage, allow to cool and cut into slices, then set aside. I usually just bake mine in the oven as opposed to frying on top of the stove.
2. Peel and clean shrimp. Toss with paprika, ground white pepper, thyme, and ground black pepper.

3. Dice onion, celery, and peppers. Set aside.

4. In large pot melt butter on medium heat. Add in flour. Continue to stir with a whisk until roux becomes a rich brown color. Should be similiar in color to a penny.

5. Add in diced onion, peppers, celery, sausage, garlic, and thyme.  Allow to cook for 5-7 minutes until vegetables are tender.

6. Add in stewed tomatos, tomato sauce, worcestershire sauce, and hot sauce.  Add desired seasonings at this time (cajun seasoning, salt, paprika, pepper, etc). Stir and bring to simmer.

7. Add in shrimp and allow to cook till shrimp turn pink.

8. Add additional seasonings to taste.
9. Serve over rice.

Read more...

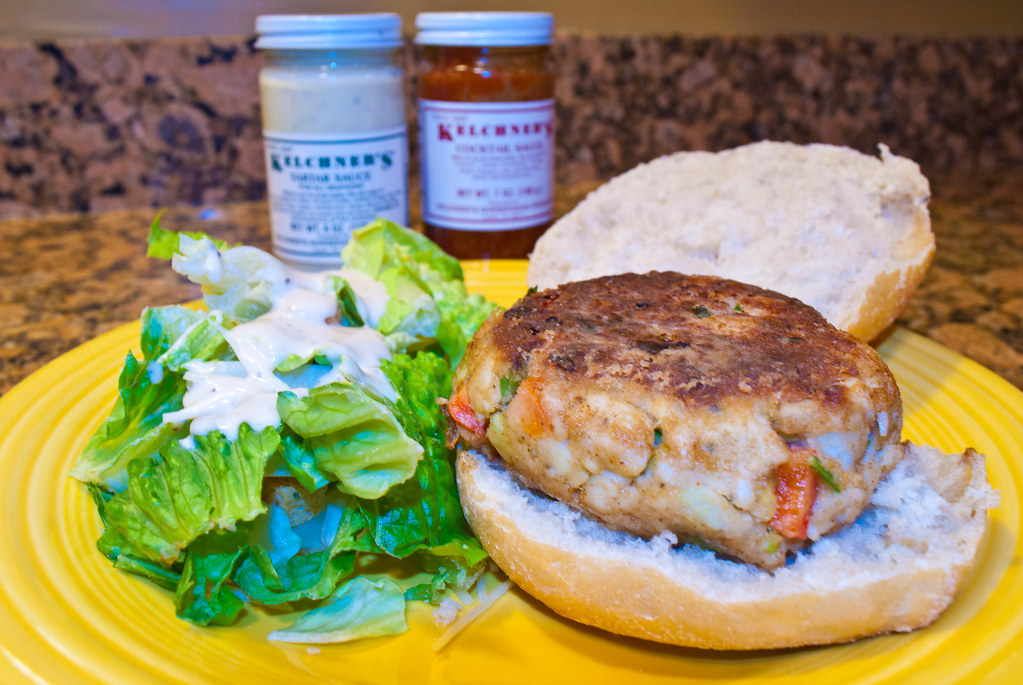
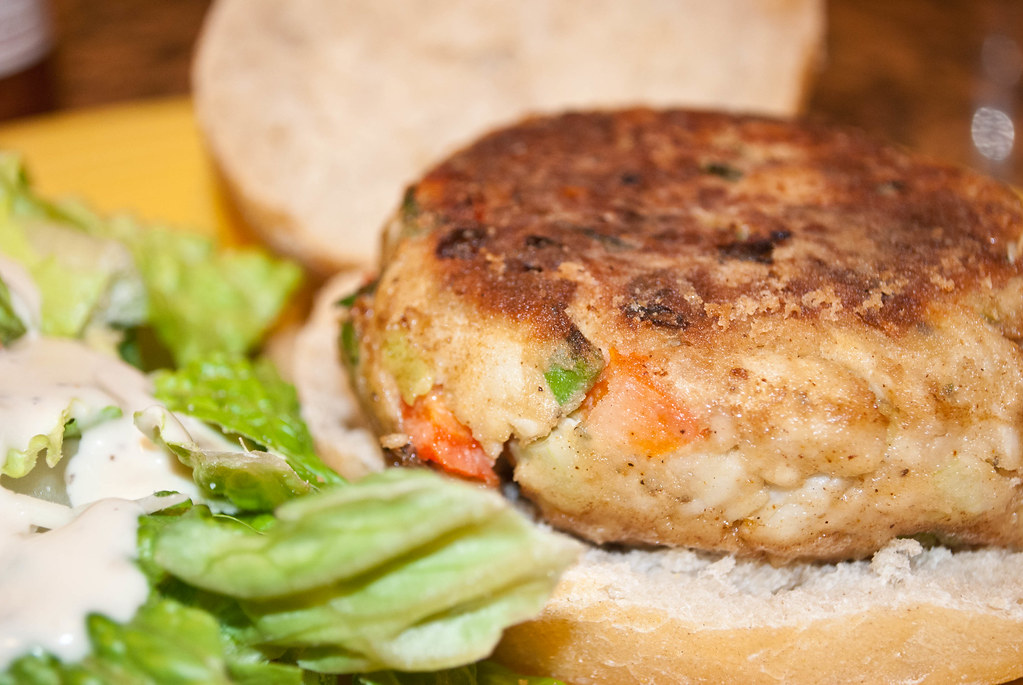
Crab Cakes Yummmmm


If you may start to notice most of my cooking decisions center around what is on sale at the supermarket. Well lo and behold lump crab meat was on sale this week, so I thought why not try my hand at crab cakes. Where ever we go and it's on the menu you best believe its going to wind up on my plate. I figured it couldn't be too much different than salmon cakes which I make all the time and which was a staple recipe in my house while growing up.

I pulled out my trusty reliable cookbooks and I decided to go with the recipe from Mark Bittman's How to Cook Everything since right off the bat he said "I like crab cakes that are mostly crab and seasonings with a minimum of bread crumbs." That's what I'm talking about. A man after my own liking. All the other recipes relied heavily on bread crumbs (even Ms. Martha) which is a no-no in my book.

Overall I was really quite pleased with the results (great texture and flavoring) and the ease of the recipe, and will definitely be making them again as soon as crab goes back on sale ;)


Crab Cakes (modified from How to Cook Everything)

Makes 4 cakes (I got 5 out of the recipe)
  • 1 pound of fresh lump crabmeat
  • 1 egg
  • 1/4 cup minced red bell pepper
  • 1/2 cup minced scallion 
  • 1/4 cup of mayonnaise
  • 1 tablespoon of mustard (I used Kelchner's hot mustard which has horseradish since I wanted a bit of a kick but the traditional choice is dijon)
  • Fresh cut parsley (I added about 1/4 cup)
  • Dill (to taste)
  • Old Bay seasoning (to taste)
  • Kosher salt and pepper (to taste)
  • 2 tablespoons of bread crumbs, or as needed
  • 2 tablespoons of olive oil
  • 2 tablespoons of butter (or use oil)
Mix together the crabmeat, egg, pepper, scallion, mayonnaise, mustard, and seasonings (dill, old bay, salt, pepper, & parsley).  Add sufficient bread crumbs to bind the mixture just enough to form into cakes, start with 2 tablespoons and use more if you need it. (I had to roughly 4 tablespoons to get it to a consistency I felt was good enough).

Refrigerate the mixture till ready to cook (at least 30 minutes or more)

Season the flour with salt, pepper, and Old Bay. Preheat a large skillet (non-stick) over medium heat for 2-3 minutes. Add oil and butter and heat until butter foam subsides. Shape crabmeat mixture into cakes, dredge in flour, and cook adjusting the heat as necessary and turning very gently once until golden brown on both sides. Total cook time is about 10 minutes.

I like to eat mine with tarter and cocktail sauce (most people think that is very weird but I love it).

Read more...

I think I have found a kindred spirit

I love her blog. My husband is going to be hating me because she has so many yummy recipes I want to try.

Go over and check it out.

Read more...

Making Preserves is Sooooo Easy


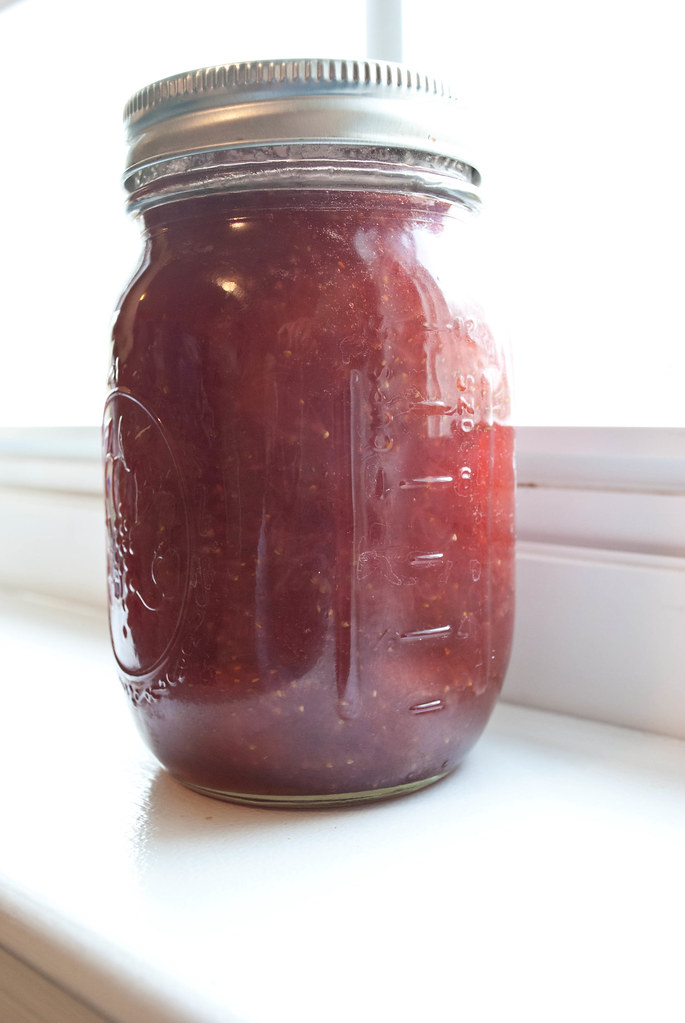
Making fruit preserves is soooooooo easy and very rewarding. Nothing beats the taste of fresh preserves made from your own two little hands. My auntie from Virginia was big into canning and I always thought it was hard or difficult till I learned how this past summer. Now I can all the time, when ever the mood strikes me (or when I can good prices on fruit at the market). This past weekend I noticed that strawberries had finally came down in price which was so ironic since we just finished off our last jar of strawberry preserves from my last big batch of canning. That was the sign for me to break out my Ball jars and get to work.

A couple of tips about canning from my experience.

  • You don't need fancy equipment. I use my 8 quart stockpot, BBQ tongs, and a large spoon. No rack and no funnel.
  • Jars are easy to acquire, they are sold in most supermarkets. Plus they are recyclable.
  • I boil and sterilize everything, jars, lids, spoon, tongs - just to be on the safe side. I sterilize as the preserves are cooking.
  • I do not add pectin to my preserves. I find that enough sugar and cook time will lead to the desired thick consistency I want.
  • I don't always hear a pop indicating that the jar has sealed properly but if you press the center of the lid  and does not move than it has sealed safely.
If you want to read thoroughly on the process here are some links (I am not really great at writing tutorials).


You can also make the following recipe and just jar it and refrigerate. You will still need to sterilize the jars but it shortens the processing time. Preserves should keep in the refrigerator for at least  two to three weeks.  


Strawberry Preserves (Courtesy of Joy of Cooking)

  • 2 pounds of fresh strawberries hulled and sliced (I prefer large chunks in mine so I usually do a mix of halves and quarters)
  • 2 1/2 cups of sugar (the recipe called for 3 but I found the recipe perfect with less)
  • Lemon juice (recipe calls for 1/4 cup but I did mine to taste)
Mix sugar and strawberries in a heavy pan under high heat. You want this puppy to boil. Once sugar has melted and notice foaming add in lemon juice. At this point I crush the mixture slightly with a potato masher to give it more texture. Continue to stir frequently. Skim off any foam that forms. (You will have to do this repeatedly). You will notice that it will cook down and began to form into a preserve like consistency. I like mine thick so I cook it down more. Once the preserves have cooked down transfer to sterilized jars and place filled jars back into pot making sure they are covered with water. You will need to boil the jars to seal and boiling time depends on the size of the jar. (see following link for guide & also great canning tips: http://pubs.ext.vt.edu/348/348-594/348-594.html) I usually do 30 minutes to be safe which is longer than what is needed.


Read more...
(never home)maker
OWP badge

  © Blogger template Shush by Ourblogtemplates.com 2009

Back to TOP